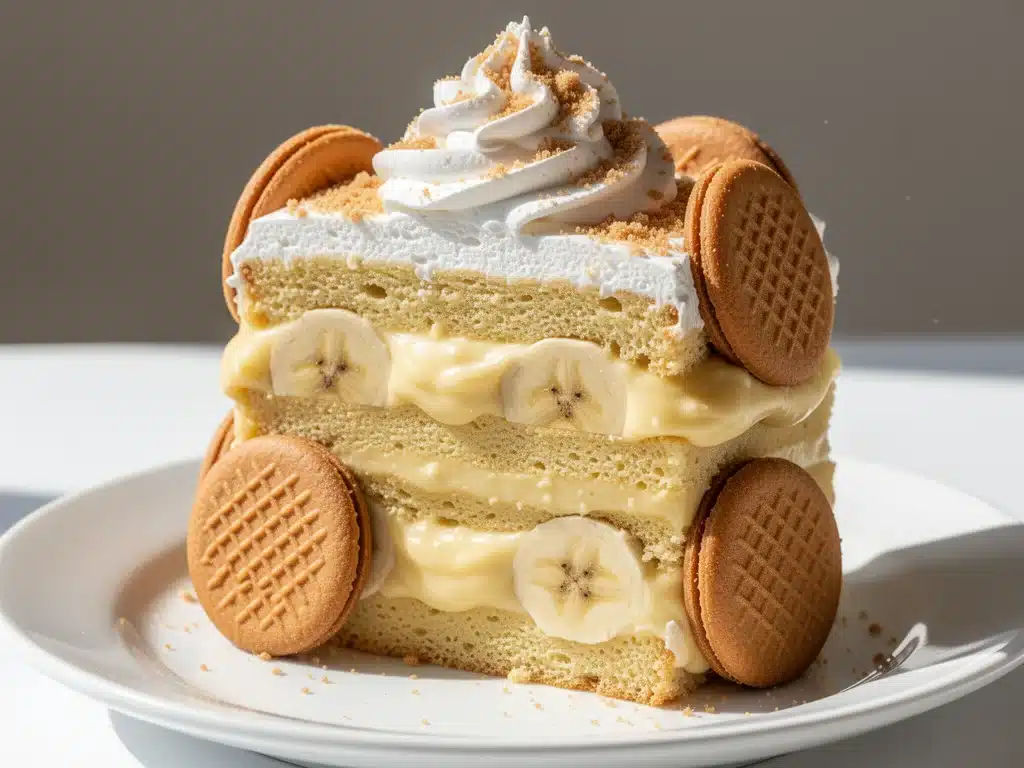
There is a specific kind of magic that happens in a Southern kitchen during late August, when the humidity is sticking to your skin and the air feels heavy enough to chew. That’s when I’m usually thinking about bananas. Not just any bananas, but those yellow, fragrant, slightly bruised beauties that are screaming to be used before they turn into compost. For years, I treated banana pudding and layer cake as two separate entities. One was a bowl of nostalgia; the other was a special occasion centerpiece. They lived in different worlds.
Then, about three years ago, I decided I was tired of choosing between a quick dessert and something that looked impressive on a Sunday table. I wanted the creamy, waffly comfort of Nilla wafers and the structural integrity of a proper cake. So, I did something reckless: I folded vanilla wafers directly into the cake batter. I was terrified it would turn into a soggy mess. Instead, it became the best dessert I’ve ever made. This banana pudding layer cake isn’t just a gimmick; it’s a texture dream. The wafers soften into the crumb, creating pockets of pudding-like richness in every bite.
I’ve tested this banana pudding layer cake recipe about fifteen times. I’ve tried different flours, different whisking methods, and yes, I’ve even tried using stale wafers (don’t). The version I’m sharing with you today is the one that made my husband stop mid-chew and ask if I ordered it from a bakery. It’s easy—seriously, only five main ingredients for the cake itself—but it delivers that classic Southern flavor profile we all crave. If you’re looking for a dessert that tastes like a hug, this is it.
Why You’ll Love This Recipe
Let’s be real: most banana pudding recipes are either too fussy (requiring a custard base that splits if you look at it wrong) or too simple (just whipped cream and instant pudding mix). This banana pudding layer cake hits the sweet spot. It’s approachable enough for a weeknight treat but elegant enough for a wedding or a church potluck. Here’s why this cake has earned a permanent spot in my rotation:
- It Uses Real Bananas — Not just banana extract. I use ripe, spotted bananas mashed right into the batter. This gives you that authentic, deep banana flavor that artificial extracts just can’t mimic. It’s the difference between a fresh peach and a peach-flavored candy.
- The “Pudding” Texture — By incorporating vanilla wafers directly into the batter, you get these soft, pudding-like chunks throughout the cake. It mimics the texture of traditional banana pudding without the risk of a runny custard layer. It’s stable, sliceable, and consistently delicious.
- Zero Fancy Equipment Needed — You don’t need a stand mixer. A hand mixer or even a strong arm and a whisk will do the job. This is a one-bowl recipe for the batter, which means less cleanup and more time eating.
- Make-Ahead Friendly — This cake actually tastes better the next day. The flavors meld together, and the wafers soften perfectly. I often make it the night before a gathering, and it travels well too. Just keep it chilled.
- Five Main Ingredients — I’m not exaggerating. For the cake itself, you need flour, sugar, butter, eggs, bananas, and wafers. That’s it. No obscure spices, no complicated ganache. Just good, honest Southern ingredients.
This banana pudding layer cake is my answer to “I want something sweet but not too heavy.” It’s rich, yes, but the bananas cut through the sweetness of the frosting. It’s the kind of dessert that makes people ask for the recipe, then ask if you’ll make it again next week.
Ingredients You’ll Need
Before we get to the mixing, let’s talk about what goes into this cake. I’m particular about a few things here, mostly because I’ve learned the hard way that cheap ingredients make a cheap cake. You don’t need anything fancy, but you do need quality basics.
For the Cake Batter
Buttermilk (1 cup / 240ml) — This is non-negotiable for that tender, Southern crumb. The acidity reacts with the baking soda to give you lift, and it adds a tangy depth that balances the sweet bananas. If you don’t have buttermilk, make your own by adding 1 tablespoon of white vinegar or lemon juice to a measuring cup, then filling the rest with whole milk. Let it sit for 10 minutes until it curdles slightly. It’s not perfect, but it works in a pinch.
Ripe Bananas (3 large / about 1 ½ cups mashed) — Look for bananas with lots of brown spots on the peel. The browner, the better. These bananas are sweeter and have a stronger flavor. If you use yellow, unripe bananas, your cake will taste bland. Mash them in a bowl until they’re mostly smooth but with a few small chunks for texture.
Vanilla Wafers (1 ½ cups / about 150g) — I use Nilla Wafers or a store-brand equivalent. Do not use vanilla sandwich cookies or thin mints. You want those crisp, buttery wafers that will soften in the batter. Tear them into rough pieces—don’t crush them into dust, and don’t leave them whole. Think “chunky cookie pieces.”
Unsalted Butter (½ cup / 115g, softened) — Softened means you can indent it with your finger, not melted. If you melt it, your cake will be dense. If it’s too hard, it won’t cream properly with the sugar. Room temperature is key.
Granulated Sugar (1 ½ cups / 300g) — This provides sweetness and helps create a light crumb. Don’t reduce the sugar; it’s not just for sweetness, it’s for texture. If you’re watching calories, I get it, but this cake relies on that sugar structure.
Eggs (3 large) — Room temperature eggs emulsify better into the batter. I take them out of the fridge about 30 minutes before I start baking. Cold eggs can cause the butter to seize up, leading to a curdled-looking batter.
All-Purpose Flour (2 cups / 250g) — Spoon and level your flour. Don’t scoop it directly from the bag, or you’ll pack in too much flour and end up with a dry cake. I use Gold Medal or King Arthur Flour, but any standard all-purpose brand works fine.
Baking Soda (1 teaspoon) — This reacts with the buttermilk and the acidity of the bananas. It gives you that rise.
Salt (½ teaspoon) — Just a pinch to balance the sweetness. Don’t skip it.
For the Frosting
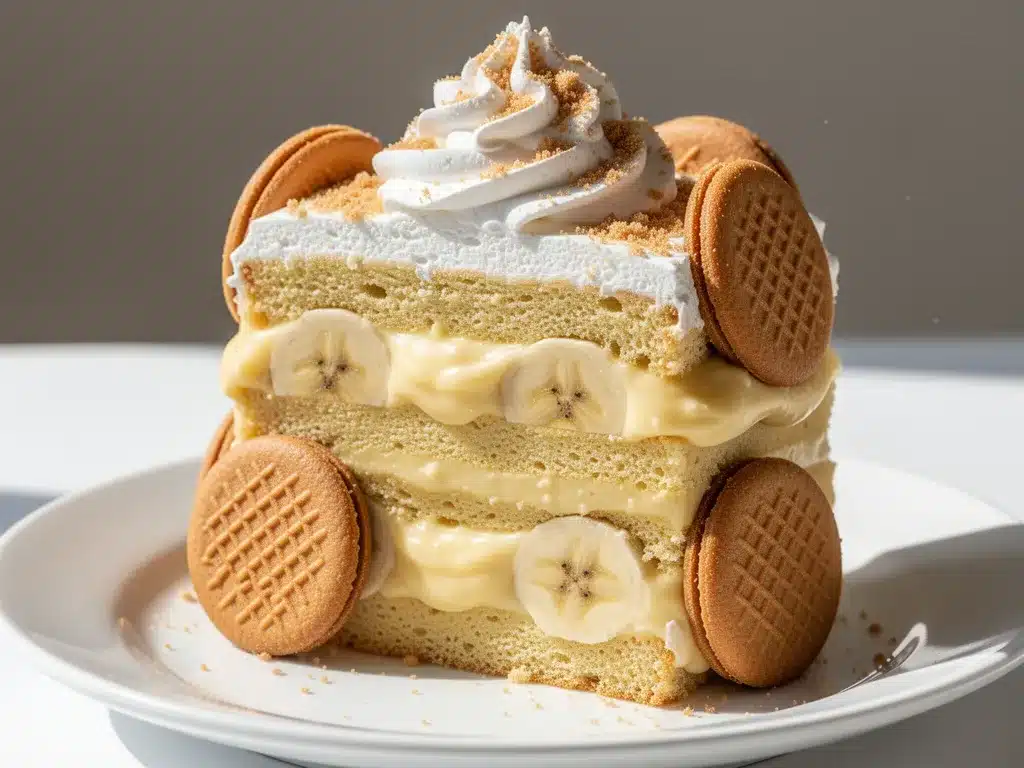
Cream Cheese (8 oz / 225g, softened) — Full-fat block cream cheese. Not the spreadable kind in a tub. It has too much water and will make your frosting runny.
Heavy Cream (1 cup / 240ml, cold) — Whip this to stiff peaks first, then fold it into the cream cheese. This lightens the frosting and makes it airy.
Vanilla Extract (1 teaspoon) — Use pure vanilla. The fake stuff tastes medicinal.
Powdered Sugar (2 cups / 240g) — Sift this if it’s clumpy. You want a silky smooth frosting.
Equipment Needed
You don’t need a professional bakery setup to make this banana pudding layer cake. Here’s what I actually use in my home kitchen:
Two 8-inch Round Cake Pans — Grease and flour them, or line the bottoms with parchment paper. I love parchment because it guarantees the cake won’t stick. If you don’t have 8-inch pans, you can use two 9-inch pans, but the layers will be thinner, and baking time will be shorter.
Mixing Bowls — One large bowl for the batter, one medium for the frosting. I use glass bowls because I can see everything clearly.
Hand Mixer or Stand Mixer — A hand mixer is totally fine here. It gives you control over the mixing. If you use a stand mixer, use the paddle attachment on medium-low speed.
Spatula — A rubber spatula is essential for folding in the wafers and bananas without overmixing. Overmixing develops gluten, which makes cake tough.
Cooling Rack — Let the cakes cool completely before frosting. Putting frosting on a warm cake is a disaster waiting to happen.
How to Make It: Step-by-Step
Alright, let’s make this! I’m walking you through exactly how I do it, including the little tricks I’ve picked up over the years.
Step 1: Prep Your Oven and Pans
Preheat your oven to 350°F (175°C). This is a moderate temperature that allows the cake to bake evenly without burning the edges. Grease your two 8-inch cake pans with butter or cooking spray, then dust them with a little flour. Tap out the excess. I also line the bottoms with parchment circles for insurance.
Step 2: Cream the Butter and Sugar
In a large bowl, beat the softened butter and granulated sugar together on medium speed for about 3-4 minutes. You want this mixture to look pale and fluffy. This step incorporates air into the batter, which is crucial for a light cake. Don’t rush this. If it looks yellow and dense, keep beating.
Step 3: Add Eggs and Bananas
Add the eggs one at a time, beating well after each addition. Then, add the mashed bananas and vanilla extract. Mix until just combined. The batter might look a little curdled here—that’s okay. It will come together when you add the dry ingredients.
Step 4: Combine Dry Ingredients
In a separate bowl, whisk together the flour, baking soda, and salt. Then, gradually add the dry ingredients to the wet mixture, alternating with the buttermilk. Start and end with the flour mixture. Mix on low speed until just combined. Overmixing at this stage is the enemy of a tender cake.
Step 5: Fold in the Wafers
Here’s the magic step. Gently fold in the torn vanilla wafers using your spatula. Be gentle. You want them distributed evenly, but you don’t want to crush them into powder. They should remain as distinct chunks. This is what gives you those pudding-like pockets in the finished cake.
Step 6: Bake
Divide the batter evenly between the two prepared pans. Bake for 25-30 minutes, or until a toothpick inserted into the center comes out clean or with just a few moist crumbs. The edges should be pulling away slightly from the pan. Do not overbake, or your cake will be dry.
Step 7: Cool Completely
Let the cakes cool in the pans for 10 minutes, then turn them out onto a wire rack to cool completely. This is vital. If you try to frost a warm cake, the frosting will melt and slide off. I usually make the cakes in the morning and frost them in the evening.
Step 8: Make the Frosting
While the cakes cool, make the frosting. Beat the softened cream cheese until smooth. Add the powdered sugar and vanilla, and beat until combined. In a separate bowl, whip the heavy cream to stiff peaks. Gently fold the whipped cream into the cream cheese mixture. Don’t overmix, or you’ll lose the airiness.
Step 9: Assemble and Decorate
Place one cake layer on your serving plate. Spread a generous layer of frosting on top. Add the second layer. Frost the top and sides with the remaining frosting. I usually decorate with fresh banana slices and a few whole vanilla wafers on top for that classic look.
Expert Tips & Tricks
Here’s everything I’ve learned from making this banana pudding layer cake dozens of times. These tips will save you from my mistakes.
Use Overripe Bananas
I can’t stress this enough. The brown spots on the peel indicate that the starches have converted to sugar. This means your cake will be sweeter and more flavorful. If your bananas are green or yellow, put them in a paper bag with an apple for a few days until they spot.
Don’t Skip the Buttermilk
Buttermilk tenderizes the gluten in the flour, giving you a softer crumb. It also adds a tangy flavor that cuts through the sweetness of the bananas and frosting. If you’re allergic to dairy, you can use coconut milk, but the texture will be different.
Fold, Don’t Stir
When adding the wafers, use a folding motion. Lift the batter from the bottom and fold it over the top. Stirring in a circular motion will break the wafers into crumbs and develop the gluten, making your cake dense.
Keep It Chilled
This cake contains cream cheese and fresh bananas, so it needs to be refrigerated. Bananas oxidize quickly, so cover the cake tightly with plastic wrap or store it in an airtight container. It will keep in the fridge for up to 3 days.
Toast the Wafers (Optional)
For an extra layer of flavor, you can lightly toast the vanilla wafers in the oven for 5 minutes at 350°F before tearing them. This brings out a buttery, nutty flavor that pairs beautifully with the bananas.
Variations & Substitutions
Once you’ve nailed the basic version, here’s how you can mix it up. I’ve tried all of these.
Chocolate Chip Banana Cake
Swap the vanilla wafers for semi-sweet chocolate chips. It’s like a banana chip cookie in cake form. Delicious and indulgent.
Caramel Drizzle
Drizzle warm caramel sauce over the top before serving. This adds a salty-sweet contrast that elevates the dessert.
Walnut Addition
Add 1 cup of chopped walnuts to the batter. This adds crunch and a nutty flavor that pairs well with the bananas. Toast the nuts first for extra flavor.
Gluten-Free
Use a 1:1 gluten-free flour blend. Make sure your vanilla wafers are certified gluten-free, as many contain wheat. The texture will be slightly denser, but still tasty.
Dairy-Free
Use vegan butter and dairy-free cream cheese. Substitute the buttermilk with almond milk plus vinegar. The flavor will be slightly different, but it still works.
Serving & Storage
This banana pudding layer cake is best served chilled. The cold temperature helps set the frosting and keeps the bananas fresh.
Storage Instructions
Store the cake in an airtight container in the refrigerator for up to 3 days. Do not freeze this cake, as the bananas and cream cheese frosting do not freeze well. The texture will become mushy upon thawing.
Serving Suggestions
I usually serve this with a cup of hot coffee or tea. The warmth of the drink contrasts nicely with the cold cake. You can also serve it with a scoop of vanilla ice cream for an extra treat.
Leftovers
If you have leftovers, wrap them tightly in plastic wrap and then in foil. This will prevent them from absorbing fridge odors. The cake will stay moist for a few days.
Nutrition Information
I’m not a nutritionist, but here’s the breakdown if you’re tracking. Keep in mind that this is a rich dessert, so portion control is key.
Per Serving (based on 12 slices):
- Calories: 450
- Fat: 22g
- Carbs: 58g
- Protein: 6g
- Sugar: 42g
This cake is high in sugar and fat due to the butter, cream cheese, and wafers. However, the bananas provide some potassium and fiber. It’s a treat to be enjoyed in moderation.
Frequently Asked Questions
Can I use instant pudding mix instead of fresh bananas?
You can, but I don’t recommend it. Instant pudding mix contains stabilizers and artificial flavors that don’t compare to the natural sweetness and texture of fresh bananas. The fresh bananas also add moisture to the cake, which is crucial for the pudding-like texture. If you’re short on time, you can use mashed banana from a jar, but fresh is best.
Why did my cake sink in the middle?
This usually happens if the oven door is opened too early or if the cake is underbaked. Make sure your oven is fully preheated and don’t open the door for the first 20 minutes of baking. Also, check your baking soda. If it’s old, it won’t react properly, and the cake won’t rise correctly.
Can I make this cake ahead of time?
Yes! This cake actually tastes better the next day. Make the cake and frost it the night before. Store it in the fridge. The flavors will meld together, and the wafers will soften perfectly. Just bring it to room temperature for 30 minutes before serving for the best texture.
What kind of vanilla wafers should I use?
I use Nilla Wafers or a store-brand equivalent. Avoid thin, crisp wafers that crumble easily, as they will turn into dust in the batter. You want wafers that hold their shape but soften during baking.
Can I use ripe plantains instead of bananas?
No. Plantains are starchy and savory, even when ripe. They don’t have the same sweetness or texture as bananas. Stick to regular dessert bananas for this recipe.
How do I prevent the bananas from browning?
The bananas are mixed into the batter, so they don’t have much exposure to air. However, if you’re adding banana slices on top for decoration, toss them in a little lemon juice to prevent browning. The cake itself won’t turn brown in the fridge.
Final Thoughts
This banana pudding layer cake is more than just a dessert; it’s a memory. It’s the taste of Southern summers, of family gatherings, and of comfort food done right. I hope you try it and make it your own. Maybe you’ll add walnuts, or drizzle it with caramel, or just enjoy it plain. Whatever you do, I hope it brings you joy.
If you make this, drop a comment and let me know what you think! I love hearing how recipes turn out in your kitchen. And if something doesn’t work, tell me that too—I’m here to help troubleshoot. Happy baking!
Pin This Recipe!
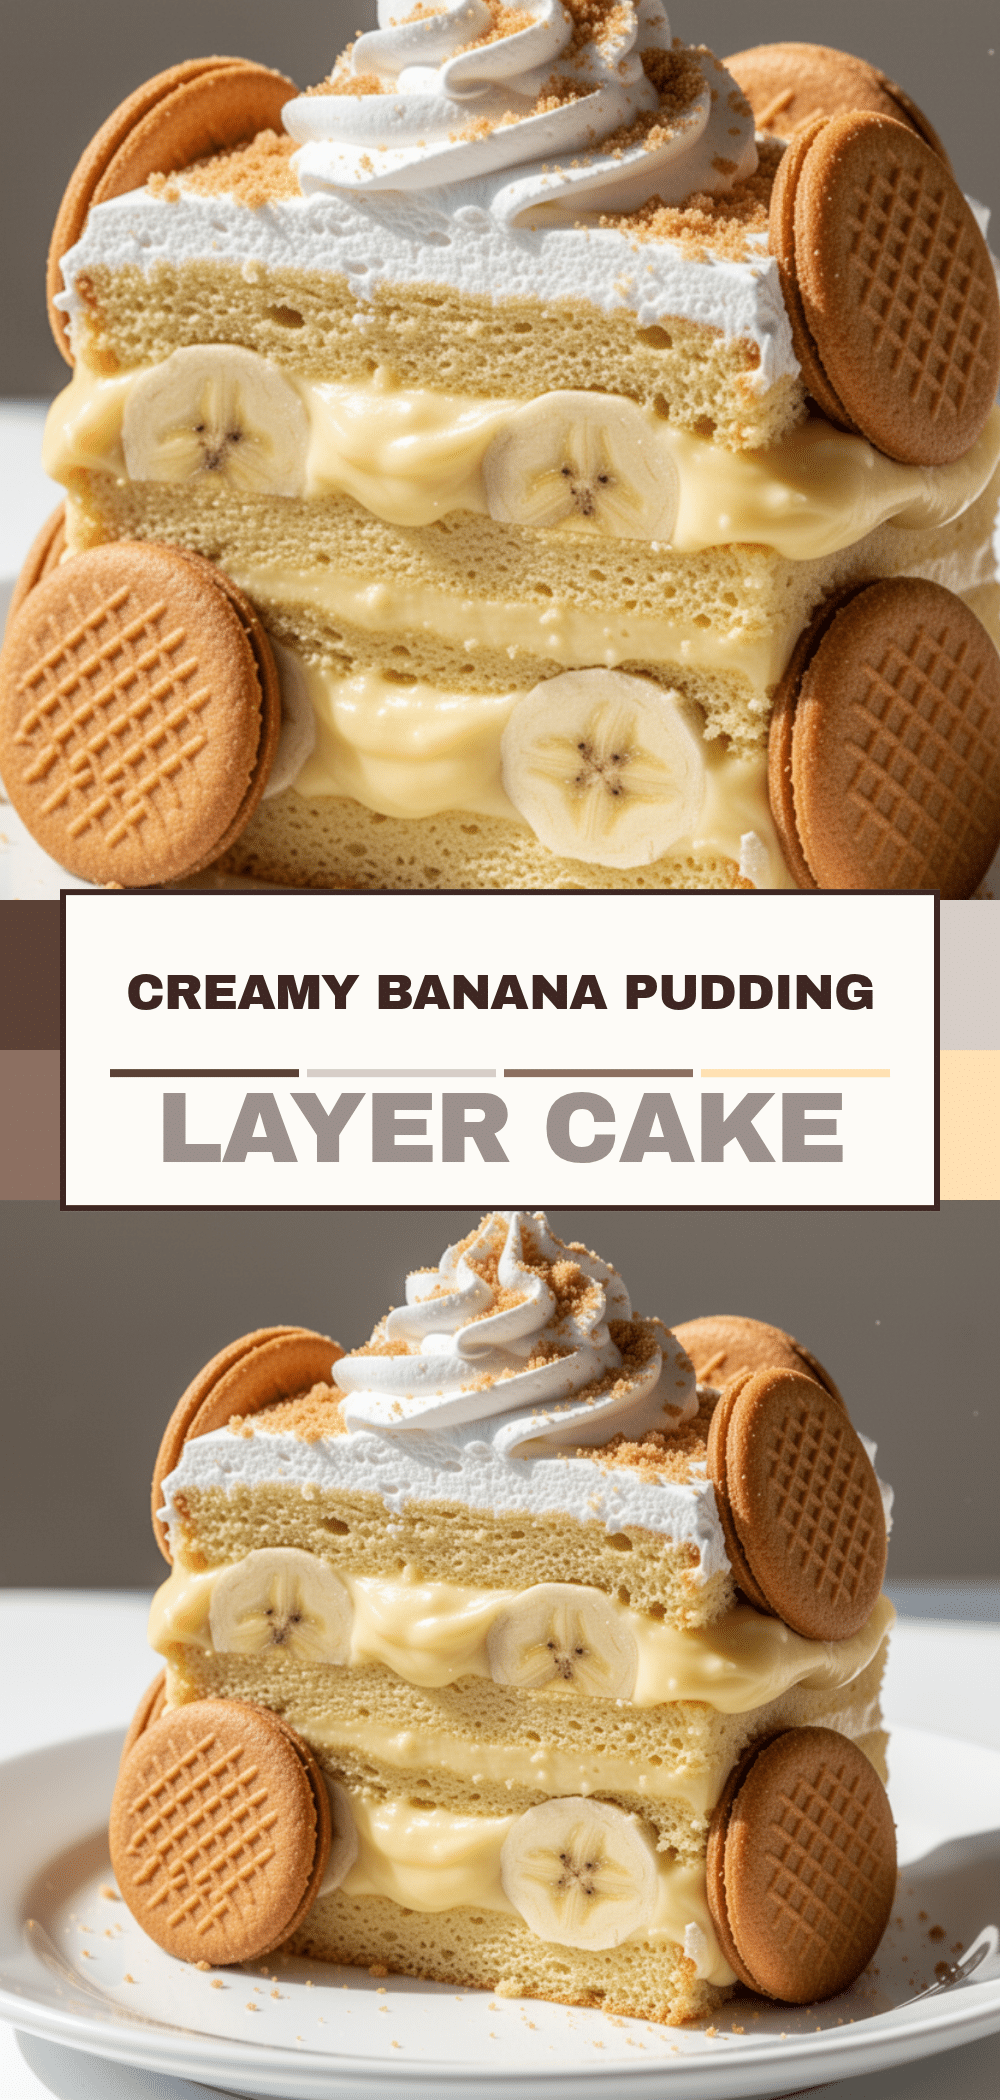
Banana Pudding Layer Cake: Easy 5-Ingredient Southern Dessert
- Total Time: 1 hour 30 minutes
- Yield: 12 servings 1x
Description
A rich, moist Southern-style layer cake that incorporates vanilla wafers directly into the batter for a pudding-like texture, topped with a creamy cream cheese frosting.
Ingredients
- 1 cup buttermilk
- 3 large ripe bananas (mashed, about 1 ½ cups)
- 1 ½ cups vanilla wafers (torn into chunks)
- ½ cup unsalted butter (softened)
- 1 ½ cups granulated sugar
- 3 large eggs (room temperature)
- 2 cups all-purpose flour
- 1 teaspoon baking soda
- ½ teaspoon salt
- 8 oz cream cheese (softened, full-fat block)
- 1 cup heavy cream (cold)
- 1 teaspoon vanilla extract
- 2 cups powdered sugar
Instructions
- Preheat oven to 350°F (175°C). Grease and flour two 8-inch round cake pans, lining bottoms with parchment paper.
- In a large bowl, beat softened butter and granulated sugar on medium speed for 3-4 minutes until pale and fluffy.
- Add eggs one at a time, beating well after each addition. Mix in mashed bananas and vanilla extract until just combined.
- In a separate bowl, whisk together flour, baking soda, and salt.
- Gradually add dry ingredients to the wet mixture, alternating with buttermilk, starting and ending with flour. Mix on low speed until just combined.
- Gently fold in torn vanilla wafers using a spatula, ensuring they remain as distinct chunks.
- Divide batter evenly between prepared pans. Bake for 25-30 minutes or until a toothpick inserted in the center comes out clean.
- Let cakes cool in pans for 10 minutes, then turn out onto a wire rack to cool completely.
- While cakes cool, beat cream cheese until smooth. Add powdered sugar and vanilla, beating until combined.
- In a separate bowl, whip heavy cream to stiff peaks. Gently fold whipped cream into the cream cheese mixture.
- Place one cake layer on a serving plate, spread a generous layer of frosting on top, add the second layer, and frost the top and sides with remaining frosting.
- Decorate with fresh banana slices and whole vanilla wafers if desired. Refrigerate until serving.
Notes
Use overripe bananas with brown spots for maximum sweetness and flavor. Do not skip the buttermilk as it tenderizes the crumb. Fold wafers gently to avoid crushing them. The cake tastes better the next day as flavors meld. Store in the refrigerator for up to 3 days; do not freeze.
- Prep Time: 30 minutes
- Cook Time: 30 minutes
- Category: Dessert
- Cuisine: Southern
Nutrition
- Serving Size: 1 slice
- Calories: 450
- Sugar: 42
- Sodium: 350
- Fat: 22
- Saturated Fat: 14
- Carbohydrates: 58
- Fiber: 2
- Protein: 6
Keywords: banana pudding, layer cake, southern dessert, vanilla wafers, cream cheese frosting, easy baking, make-ahead dessert


