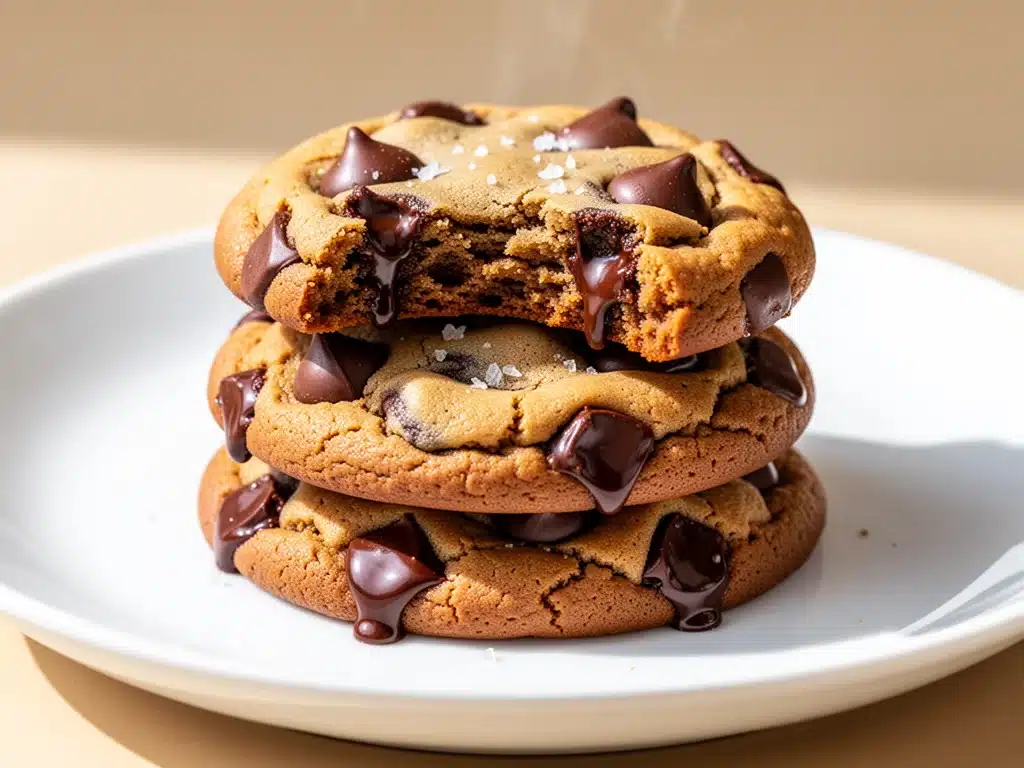
Last Tuesday, I was staring at a batch of chocolate chip cookies that looked perfect but tasted… well, like a chocolate chip cookie. You know the type. Sweet, buttery, soft, and completely forgettable. I’d made them a dozen times that month because they were the only thing my kids would eat for “dessert” after dinner. They were reliable, sure. But they weren’t special. They weren’t the kind of cookie you’d bring to a potluck and watch disappear in three minutes flat. They were just… there.
I was frustrated. I love chocolate chip cookies. I’ve loved them since I was seven years old standing on a step stool in my mom’s kitchen, trying not to eat all the dough before it hit the oven. But I wanted more. I wanted depth. I wanted those edges that crackle and those centers that are so fudgy they’re almost like brownies. I wanted the kind of cookie that makes people stop mid-chew and ask, “What’s different about these?”
The answer, as it turns out, was staring me in the face the whole time: brown butter. I’d heard about it for years. I’d read the food blogs. I’d even tried it once in a batch of banana bread, which came out fine but didn’t really wow me. So I wrote it off as a technique for fancy people who care about nutty, toasted notes in their baked goods. But then I made these brown butter chocolate chip cookies. And everything changed.
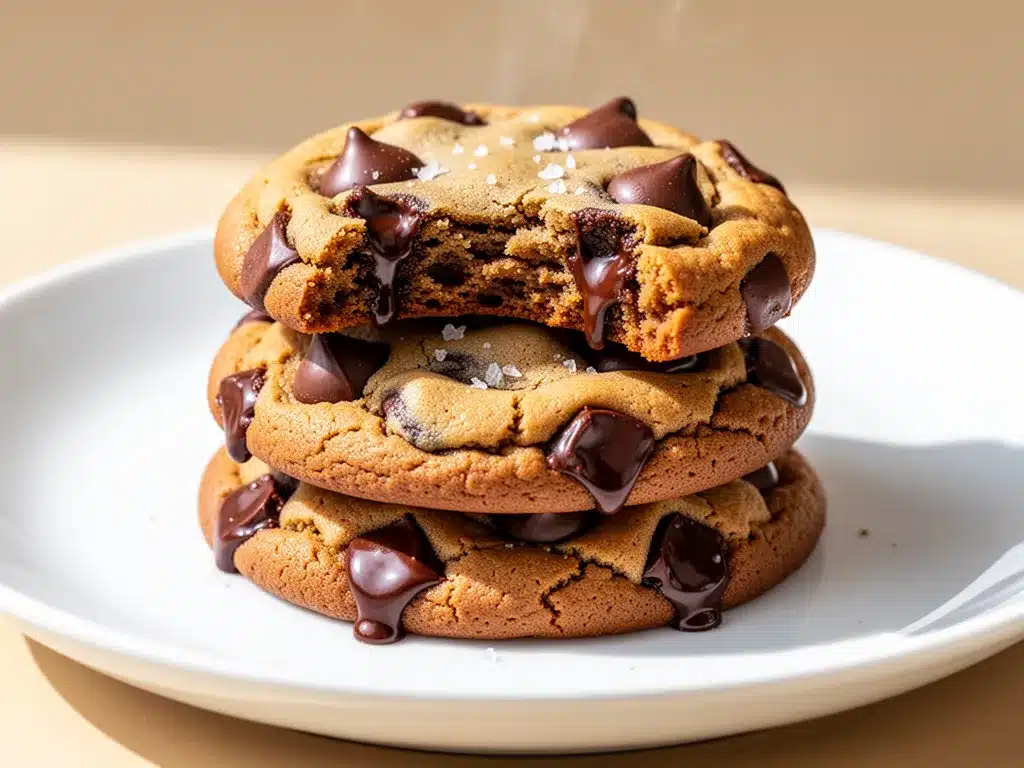
These cookies are different. They’re chewier, richer, and have this incredible toasty, caramel-like flavor that regular butter just can’t achieve. The edges are crisp, the centers are soft and fudgy, and every single bite has this deep, complex taste that makes you close your eyes and savor it. I’ve made this brown butter chocolate chip cookie recipe at least fifteen times in the last six weeks. I’ve tested it with different brands of chocolate, different flours, different sugars. I’ve burned the butter twice (yes, twice) and learned exactly how to do it right. And now, I’m sharing everything I’ve learned with you.
If you’ve ever wanted a chocolate chip cookie that tastes like it came from a high-end bakery but is actually easy enough to make on a Tuesday night, this is your recipe. This brown butter chocolate chip cookie is my new obsession, and I’m pretty sure it’ll become yours too.
Why You’ll Love This Recipe
There are a lot of chocolate chip cookie recipes out there. Thousands of them. So why this one? Why spend the extra ten minutes browning the butter? Here’s the thing: once you taste these, you won’t go back. I promise.
The Flavor Is Next Level — Regular butter tastes like butter. Brown butter tastes like butter has been having a really good time. It’s nutty, toasty, and deeply caramelized. It adds a savory complexity that cuts through the sweetness of the sugar and chocolate. It’s not just “buttery”; it’s interesting. My husband, who claims he doesn’t care about baking details, literally asked me what secret ingredient I used. I told him it was just butter. He didn’t believe me until I made them again the next day.
Texture Perfection — These cookies have the ideal chew. Not cakey, not crispy all the way through, but a genuine chew with crisp edges. The brown butter changes the protein structure of the dough, leading to a denser, fudgier center. I’ve tested these with both all-purpose and bread flour, and all-purpose gives the best balance of chew and tenderness. If you like that crackly top and soft middle, this is it.
It’s Actually Easy — I know, I know. “Brown butter” sounds like a technique that requires a degree in pastry arts. It doesn’t. It’s just butter melted in a pan until the milk solids turn brown. It takes about 5 minutes. You watch it, you stir it, you take it off the heat. Done. The rest of the recipe is standard cookie mixing. No special equipment, no fancy techniques. Just better butter.
They Keep Well — One of the biggest struggles with homemade cookies is that they go stale by day three. These? They stay chewy for days. I keep a batch in an airtight container, and on day four, they’re still soft. The brown butter actually helps retain moisture, which is a huge bonus for meal preppers or people who like to make cookies ahead of time.
They’re Crowd-Pleasing — I’ve made these for book club, for the neighborhood kids, for my office, and for my in-laws. Everyone loves them. Even people who claim they “don’t like sweet cookies” ask for the recipe. The savory notes from the brown butter balance the sugar so perfectly that it’s never cloying.
This isn’t just a cookie. It’s an upgrade. It’s the kind of recipe that makes you feel like a pro baker, even if you’re just a home cook like me. And once you make it, you’ll wonder why you ever settled for regular butter cookies.
Ingredients You’ll Need
Here’s the best part: you probably already have most of these ingredients in your pantry. The brown butter is the star, but the rest is classic cookie stuff. I’m particular about a few things here, so let’s break it down.
For the Brown Butter
Unsalted Butter (1 cup / 226g) — I use unsalted because it lets you control the salt in the dough. If you use salted butter, you’ll need to reduce the added salt in the recipe. I always buy high-quality butter—Kerrygold or Plugra are my go-tos. The better the butter, the better the brown butter flavor. Don’t cheap out here. It makes a huge difference.
The Pan — Use a light-colored stainless steel or aluminum saucepan. Dark pans make it hard to see the color change of the milk solids. I learned this the hard way with a black non-stick pan where I couldn’t tell if the butter was golden or burnt until it was too late.
For the Dough
All-Purpose Flour (2 ¼ cups / 280g) — I stick with all-purpose for the perfect chew. Bread flour makes them too cakey, and cake flour makes them too tender. All-purpose hits the sweet spot. Spoon and level your flour—don’t scoop it, or you’ll end up with dry, crumbly cookies.
Granulated Sugar (½ cup / 100g) — This helps create the crisp edges. It’s the sugar that caramelizes and spreads, giving you those lacy, crunchy borders.
Brown Sugar (1 ½ cups / 300g, packed) — This is the moisture keeper. It’s what makes the centers chewy and fudgy. I use dark brown sugar for a deeper molasses flavor, but light brown works too. Just make sure it’s packed tight when you measure.
Eggs (2 large, room temperature) — Room temperature eggs incorporate into the dough more evenly, leading to a smoother batter. If you’re in a rush, crack them into a bowl of warm water for 5 minutes. Cold eggs can seize up your butter mixture.
Vanilla Extract (2 teaspoons) — Use real vanilla, not imitation. The flavor is so prominent in these cookies that fake vanilla will taste chemical. I use Nielsen-Massey or Bourbon vanilla for the best depth.
Salt (1 teaspoon fine sea salt) — Salt is crucial for balancing the sweetness. I use fine sea salt because it dissolves evenly. If you use kosher salt, you might need a bit more because the grains are larger.
Baking Soda (1 teaspoon) — This is the leavening agent. It helps the cookies spread and rise slightly. Don’t use baking powder; it’s a different chemical reaction and will change the texture.
For the Mix-Ins
Chocolate Chips (2 cups / 340g) — I use a mix of semi-sweet and milk chocolate chips. Semi-sweet keeps it from being too sweet, and milk chocolate adds creaminess. I also chop up a few chocolate bars for irregular chunks that melt into gooey pockets. Ghirardelli or Guittard are my favorites.
Flaky Sea Salt (Optional but Recommended) — A sprinkle on top right after baking. It’s not just for looks. The salt crystals melt slightly into the warm cookie, creating bursts of salty flavor that contrast with the sweet chocolate. Maldon is the gold standard, but any flaky sea salt works.
Equipment Needed
You don’t need fancy equipment for this. Here’s what I actually use.
Saucepan — A 2-quart stainless steel saucepan. I prefer stainless because it conducts heat evenly and lets you see the butter color change. Non-stick works if you’re careful, but you can’t see the browning as well.
Large Mixing Bowl — Something sturdy that won’t tip over when you’re beating the butter and sugar. I use a glass bowl because I can see the color of the mixture.
Electric Mixer or Wooden Spoon — I use a hand mixer for speed, but a wooden spoon works fine if you don’t mind some arm work. You’ll be creaming the butter and sugars, so whatever makes that easier is what you should use.
Cookie Scoop — I use a 2-tablespoon scoop for uniform cookies. Uniformity means even baking. If you don’t have a scoop, use two spoons to form balls. Don’t just eyeball it, or you’ll get some huge cookies and some tiny ones.
Baking Sheets — I use half-sheet pans. Light-colored aluminum pans are best because they reflect heat and prevent the bottoms from burning. Dark pans absorb heat, which can lead to over-browned bottoms.
Parchment Paper — Line your baking sheets. It prevents sticking and makes cleanup a breeze. It also helps with even baking by creating a slight insulating layer.
Wire Rack — For cooling the cookies. You can eat them warm, but they’ll keep their shape better if you let them cool for 5 minutes on the pan, then transfer to a rack.
How to Make It: Step-by-Step
Alright, let’s make these brown butter chocolate chip cookies! I’m walking you through exactly how I do it, including the little tricks I’ve picked up along the way.
Step 1: Brown the Butter (5-7 minutes)
This is the most important step. Cut the butter into cubes so it melts evenly. Put it in a light-colored saucepan over medium heat. Stir constantly with a silicone spatula or wooden spoon. At first, it’ll just melt. Then it’ll start to foam and bubble. Listen to it—it’ll sound like sizzling bacon. Watch the bottom of the pan. You’ll see little brown specks forming. That’s the milk solids browning. Once the butter smells nutty (like toasted hazelnuts or popcorn) and the solids are a deep golden brown, take it off the heat immediately. Pour it into a heatproof bowl to stop the cooking. Let it cool for 10-15 minutes until it’s still liquid but not hot. If it’s too hot, it’ll melt the chocolate chips later. If it’s too cold, it’ll clump up the dough.
Step 2: Mix the Wet Ingredients (2 minutes)
In a large bowl, whisk the cooled brown butter, granulated sugar, and packed brown sugar together. Whisk vigorously for about 1-2 minutes. This helps dissolve the sugar slightly and incorporates air. It’s a small step, but it contributes to that crackly top. Add the eggs one at a time, whisking well after each addition. Stir in the vanilla extract. The mixture should look glossy and slightly thickened.
Step 3: Combine Dry Ingredients (1 minute)
In a separate medium bowl, whisk together the flour, baking soda, and salt. Make sure there are no lumps of flour or baking soda. This ensures even distribution in the dough.
Step 4: Make the Dough (2 minutes)
Gradually add the dry ingredients to the wet ingredients. Mix on low speed or stir with a wooden spoon just until the flour disappears. Do not overmix. Overmixing develops gluten, which leads to tough cookies. You want tender, chewy cookies. Once the dough comes together, fold in the chocolate chips. If you’re using chopped chocolate, fold those in too. The dough will be thick and sticky. If it feels too warm and soft, pop it in the fridge for 20 minutes. Chilling the dough is optional but recommended—it prevents over-spreading and deepens the flavor.
Step 5: Scoop and Bake (12-14 minutes)
Preheat your oven to 350°F (175°C). Line two baking sheets with parchment paper. Scoop the dough into 2-tablespoon balls, about 2 inches apart. They will spread, so give them room. Bake for 12-14 minutes. The edges should be golden brown and set, but the centers should still look slightly soft and underbaked. This is key. They will firm up as they cool. If you bake them until the centers are firm, they’ll be dry and cakey when cooled. Pull them out when they look just barely done.
Step 6: Cool and Finish (10 minutes)
Let the cookies sit on the baking sheet for 5 minutes. This allows them to set. Then, transfer them to a wire rack to cool completely. If you’re feeling fancy, sprinkle a tiny pinch of flaky sea salt on top right after they come out of the oven. The residual heat will melt the salt slightly into the cookie. Enjoy warm, at room temperature, or even cold straight from the fridge.
Expert Tips & Tricks
Here’s everything I’ve learned from making these dozens of times. These tips will save you from my mistakes.
Don’t Burn the Butter — It’s easy to go from perfect to burnt in 30 seconds. Once the foam subsides and you see the brown specks, stay right there. If it smells acrid or bitter, you’ve gone too far. Start over. It’s better to under-brown than to over-brown. Under-browned butter just tastes less nutty. Burnt butter tastes like soap.
Chill the Dough — I know it’s tempting to bake immediately, but chilling the dough for at least 30 minutes (or up to 72 hours) makes a huge difference. It hydrates the flour, concentrates the flavors, and prevents the cookies from spreading too thin. My favorite method: scoop the dough balls onto a baking sheet, freeze them for 15 minutes, then transfer to a container. This way, you can bake fresh cookies straight from the freezer whenever you want.
Underbake Slightly — This is the secret to chewy cookies. Pull them out when the edges are golden but the centers still look soft. They will continue to cook on the hot pan. If you wait until they look fully done in the oven, they’ll be overdone by the time they cool.
Use Room Temperature Eggs — Cold eggs can cause the brown butter to solidify into lumps. If your eggs are cold, warm them in a bowl of tap water for 5 minutes before using. This ensures a smooth, emulsified dough.
Don’t Skip the Salt — Salt enhances flavor. Without it, the cookies taste flat and overly sweet. Use fine sea salt for even distribution. If you’re sensitive to salt, don’t reduce it by more than ¼ teaspoon, or you’ll miss out on the flavor balance.
Variations & Substitutions
Once you’ve nailed the basic version, here’s how you can mix it up. I’ve tried all of these.
White Chocolate Macadamia — Swap the chocolate chips for white chocolate chips and add 1 cup of toasted macadamia nuts. The brown butter pairs beautifully with white chocolate and nuts. It’s like a cookie version of a macadamia nut brownie.
Peanut Butter Swirl — Add 2 tablespoons of peanut butter to the dough before scooping. Or, swirl a teaspoon of peanut butter into the top of each cookie before baking. The salty, nutty flavor complements the brown butter perfectly.
Oatmeal Brown Butter — Add 1 cup of rolled oats to the dry ingredients. This adds chewiness and a heartier texture. It’s like a brown butter oatmeal raisin cookie, but with chocolate chips. Add ½ cup of raisins if you want.
Gluten-Free — Use a 1:1 gluten-free flour blend that contains xanthan gum. I’ve used Bob’s Red Mill and Cup4Cup, and both work well. The texture might be slightly more tender, but the flavor is the same.
Dairy-Free — Replace the butter with a high-quality dairy-free butter stick (like Miyoko’s or Earth Balance). Note that the “brown” effect won’t be exactly the same, but you’ll still get a nutty, toasted flavor. Use dairy-free chocolate chips and you’re good to go.
Vegan — Use vegan butter and vegan chocolate chips. You might need to add a flax egg (1 tablespoon ground flaxseed mixed with 3 tablespoons water) to replace the eggs, but the texture will be slightly different. It’s still delicious, just not identical to the original.
Serving & Storage
How to Serve: I usually serve these warm, right after they’ve cooled for 5 minutes. They’re best with a cold glass of milk. But they’re also great at room temperature or even cold. I love eating them straight from the fridge on a hot day.
Side Dishes: These cookies are a dessert on their own, but if you’re serving them at a party, they go well with coffee or tea. They also pair nicely with fruit tarts or cheesecake if you’re doing a dessert spread.
Storage: Store in an airtight container at room temperature for up to 5 days. They stay chewy for days. If you want to keep them longer, freeze the dough balls. Place them on a baking sheet, freeze until solid, then transfer to a freezer bag. Bake straight from frozen, adding 1-2 minutes to the baking time.
Reheating: Warm them in the microwave for 10-15 seconds. Or, bake frozen dough balls straight from the freezer for 14-16 minutes. They’ll taste fresh-baked every time.
Freezing the Dough: This is my favorite tip. Scoop the dough into balls, freeze on a baking sheet, then transfer to a freezer bag. You can bake them anytime for up to 3 months. It’s like having fresh cookies on demand.
Nutrition Information
I’m not a nutritionist, but here’s the breakdown if you’re tracking. Keep in mind that this is an estimate based on standard ingredients.
Per Cookie (makes about 24 cookies):
- Calories: 180
- Protein: 2g
- Carbs: 24g
- Fiber: 1g
- Sugar: 16g
- Fat: 10g
- Saturated Fat: 6g
- Cholesterol: 25mg
- Sodium: 150mg
What’s Good: Decent amount of energy from the carbs and fats. The brown butter adds healthy fats, though it’s still high in calories due to the butter and sugar.
What to Know: These are a treat. They’re higher in sugar and saturated fat than a standard cookie because of the brown butter and chocolate. Enjoy in moderation. If you want to lighten them up, reduce the sugar by ¼ cup or use dark chocolate chips with less sugar.
Final Thoughts
So that’s my brown butter chocolate chip cookie recipe! I’ve probably talked your ear off at this point, but when you make a recipe this often, you have a lot to say about it. These cookies have saved my dessert game. They’re my answer to “what should I bring to the party?” or “how do I impress my in-laws?” or even just “what should I have with my coffee on a rainy Sunday?”
They’re not just cookies. They’re an experience. The smell alone—nutty, toasty, buttery—will fill your house and make everyone wonder what’s baking. The texture is perfect. The flavor is deep and complex. And the best part? They’re easy to make.
Make them yours! Try different chocolates, add nuts, or sprinkle sea salt. The base recipe is forgiving and versatile. But start with the classic version. You’ll understand why I’m obsessed.
If you make these brown butter chocolate chip cookies, drop a comment and let me know what you think! I love hearing how recipes turn out in your kitchen. And if something doesn’t work, tell me that too—I’m here to help troubleshoot. Happy baking! And I hope your kitchen smells half as good as mine does right now.
Frequently Asked Questions
Q: Can I use salted butter instead of unsalted?
A: You can, but you’ll need to reduce the added salt in the recipe. Salted butter varies in salt content, so start by reducing the added salt to ½ teaspoon and adjust to taste. I recommend unsalted so you have full control over the flavor.
Q: Why did my cookies spread too much?
A: This usually happens if the butter was too warm when you mixed the dough, or if you didn’t chill the dough. Make sure the brown butter is cooled to room temperature (still liquid, but not hot) before mixing. Also, chill the dough for at least 30 minutes before baking.
Q: Can I freeze the baked cookies?
A: Yes! Let them cool completely, then store them in an airtight container or freezer bag. They’ll keep for up to 3 months. Thaw at room temperature or warm in the microwave for 10 seconds before eating.
Q: Why is my brown butter smoking?
A: Your heat was too high. Brown butter should be made over medium heat. If it’s smoking, the milk solids are burning. Turn off the heat immediately and discard it. Start over with a lower heat setting.
Q: Can I use brown sugar instead of granulated sugar?
A: You can, but the ratio will change the texture. If you use all brown sugar, the cookies will be softer and chewier but less crisp on the edges. The recipe calls for a mix to get the best of both worlds. If you must, use 2 cups of packed brown sugar, but expect a softer cookie.
Q: Do I need to use a stand mixer?
A: No. A hand mixer or even a wooden spoon works fine. The key is to cream the butter and sugars until smooth. A mixer takes less time, but a spoon works if you have the arm strength.
Q: Can I add nuts?
A: Absolutely! Toasted pecans, walnuts, or macadamia nuts are great additions. Add 1 cup of chopped nuts along with the chocolate chips. Toasting them first enhances the flavor.
Pin This Recipe!
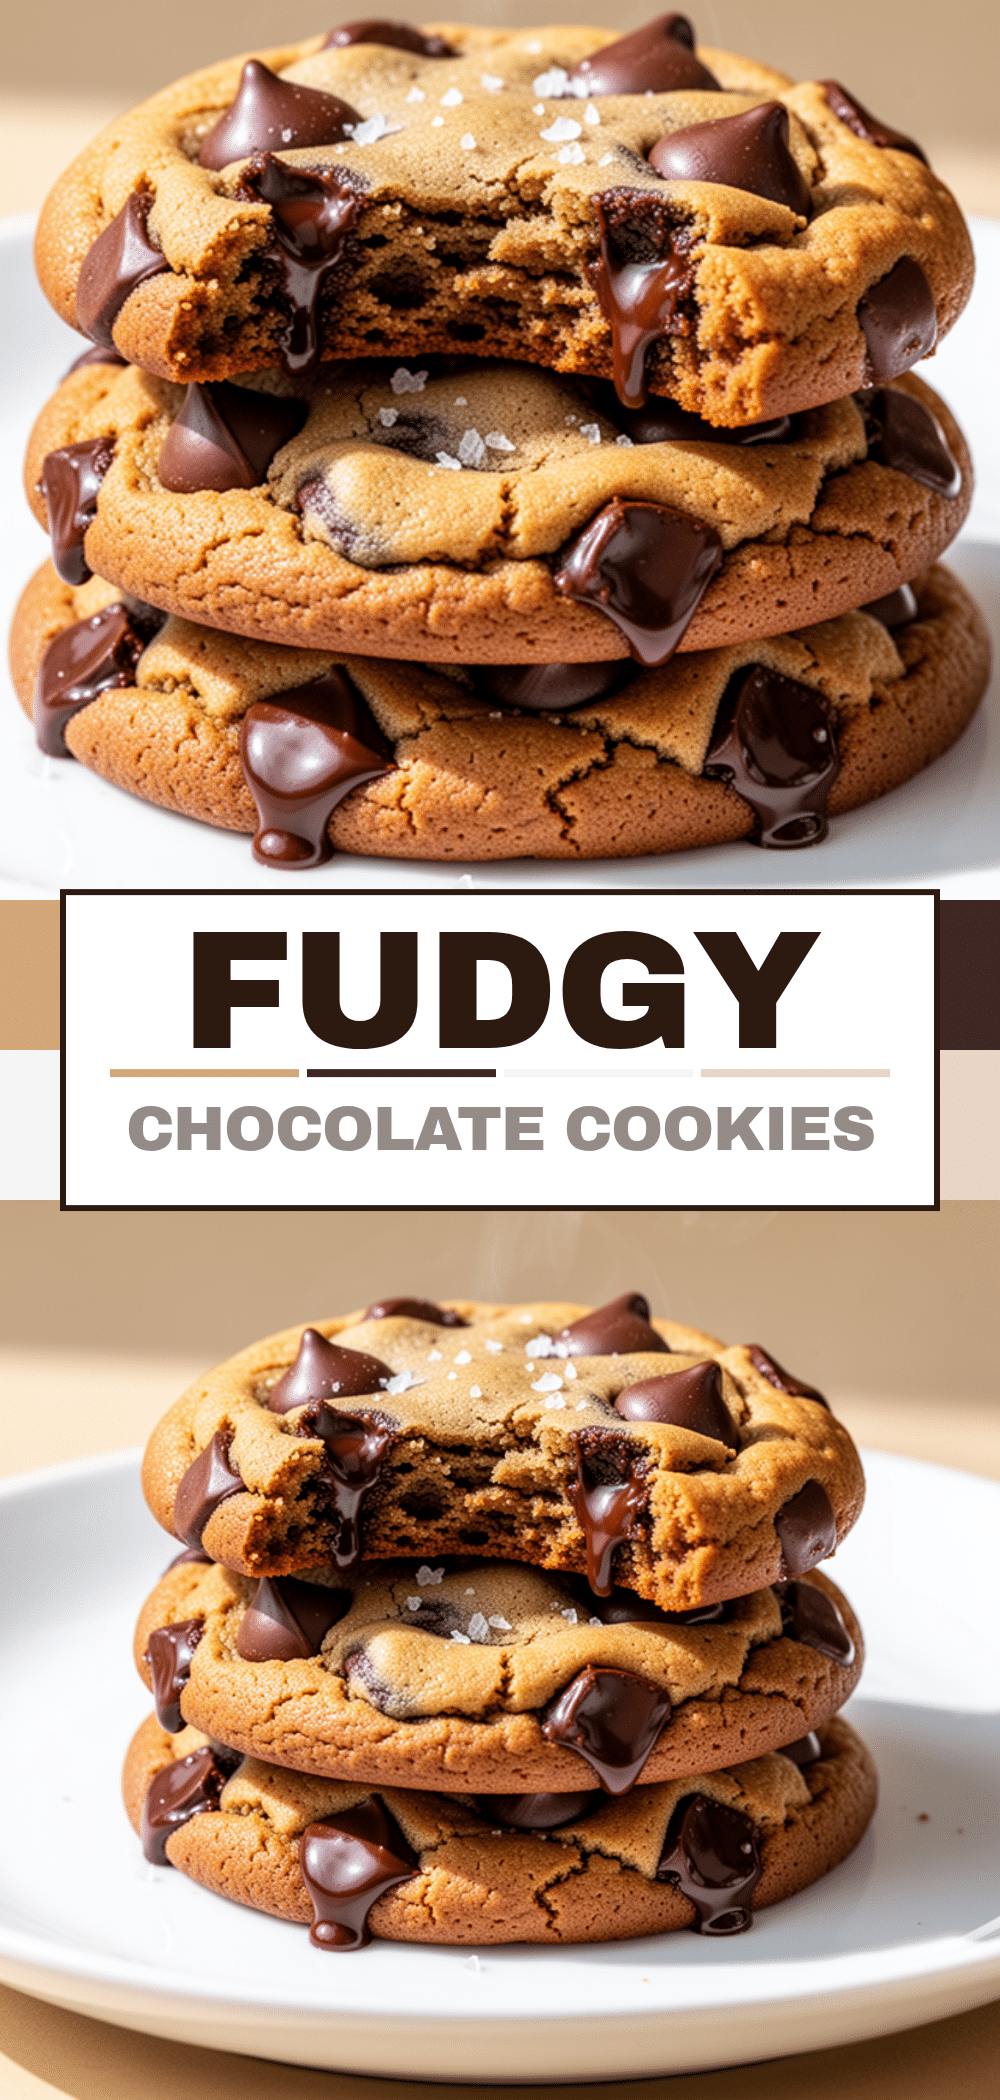
Brown Butter Chocolate Chip Cookies: Easy Chewy Recipe
- Total Time: 34 minutes
- Yield: 24 cookies 1x
Description
These brown butter chocolate chip cookies are chewy, rich, and have a deep, toasty caramel-like flavor. The edges are crisp while the centers remain soft and fudgy, making them an upgrade from standard chocolate chip cookies.
Ingredients
- 1 cup (226g) unsalted butter
- 2 ¼ cups (280g) all-purpose flour
- ½ cup (100g) granulated sugar
- 1 ½ cups (300g) packed brown sugar (dark or light)
- 2 large eggs, room temperature
- 2 teaspoons vanilla extract
- 1 teaspoon fine sea salt
- 1 teaspoon baking soda
- 2 cups (340g) chocolate chips (mix of semi-sweet and milk)
- Flaky sea salt (optional, for topping)
Instructions
- Brown the butter: Cut butter into cubes and melt in a light-colored saucepan over medium heat. Stir constantly until it smells nutty and milk solids are deep golden brown (5-7 minutes). Pour into a heatproof bowl and cool for 10-15 minutes until liquid but not hot.
- Mix wet ingredients: In a large bowl, whisk cooled brown butter, granulated sugar, and brown sugar vigorously for 1-2 minutes. Add eggs one at a time, whisking well after each. Stir in vanilla extract.
- Combine dry ingredients: In a separate medium bowl, whisk together flour, baking soda, and salt.
- Make the dough: Gradually add dry ingredients to wet ingredients. Mix on low speed or stir with a wooden spoon just until flour disappears. Do not overmix. Fold in chocolate chips. If dough is too warm, chill for 20 minutes.
- Scoop and bake: Preheat oven to 350°F (175°C). Line baking sheets with parchment paper. Scoop dough into 2-tablespoon balls, 2 inches apart. Bake for 12-14 minutes until edges are golden but centers look slightly soft.
- Cool and finish: Let cookies sit on baking sheet for 5 minutes, then transfer to a wire rack. Sprinkle with flaky sea salt immediately after baking if desired.
Notes
Ensure butter is cooled to room temperature (still liquid) before mixing to prevent lumps. Chilling the dough for at least 30 minutes prevents over-spreading and deepens flavor. Underbake slightly for chewy centers. Store in an airtight container for up to 5 days or freeze dough balls for up to 3 months.
- Prep Time: 20 minutes
- Cook Time: 14 minutes
- Category: Dessert
- Cuisine: American
Nutrition
- Serving Size: 1 cookie
- Calories: 180
- Sugar: 16
- Sodium: 150
- Fat: 10
- Saturated Fat: 6
- Carbohydrates: 24
- Fiber: 1
- Protein: 2
Keywords: brown butter, chocolate chip cookies, chewy cookies, easy baking, homemade cookies, dessert recipe


