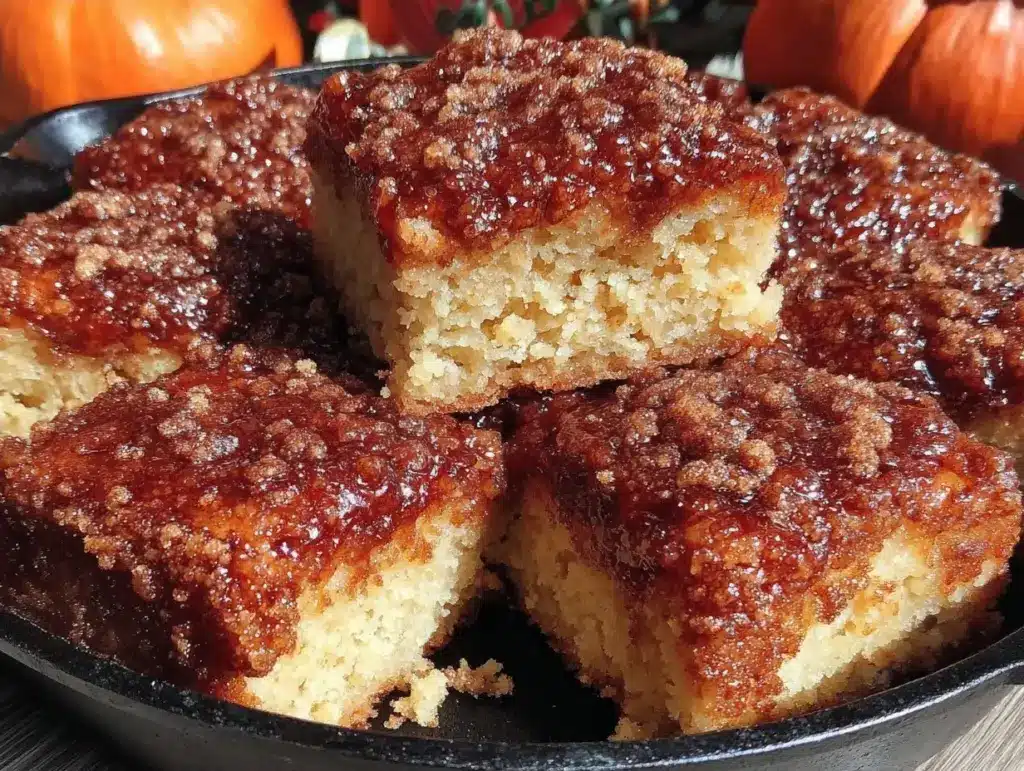
There was a specific Tuesday in October last year when the air turned crisp and my kitchen needed something warm. I wasn’t looking for a heavy pumpkin loaf or a dense gingerbread. I wanted that nostalgic, cinnamon-sugar hug that only a snickerdoodle can provide, but in a form that was easy to share and impossible to resist. I pulled out the butter, cracked the eggs, and started mixing. What came out of the oven wasn’t just a cookie; it was a bar. Chewy in the center, crisp at the edges, and coated in that signature cinnamon-sugar swirl that smells like autumn itself.
I’ve made these Cozy Fall Snickerdoodle Bars at least six times since that first batch. Each time, I’ve tweaked the ratio of cinnamon to sugar, adjusted the bake time by a minute or two, and tested different flours until I landed on the perfect texture. These bars are soft, pillowy, and deeply spiced. They capture the essence of the season without relying on heavy spices or exotic ingredients. Instead, they lean on what’s fresh and simple: high-quality butter, warm cinnamon, and granulated sugar.
The beauty of this Cozy Fall Snickerdoodle Bars recipe is its versatility. You can serve them for breakfast with a glass of cold milk, as an afternoon snack with coffee, or as dessert after a light dinner. They freeze beautifully, making them perfect for meal prep or gifting. I’ve found that the cinnamon flavor deepens over time, so these bars actually taste better on day two or three. If you’re looking for a seasonal bake that’s easy, comforting, and utterly delicious, you need to try these. They’ve become my go-to for any fall gathering, and I know you’ll love them too.
Why You’ll Love This Recipe
There are a few reasons why these bars have taken over my baking rotation. It’s not just about the taste—though that’s definitely a huge part of it. It’s about the experience of making them and the joy of eating them. Here’s why you’ll fall in love with this recipe just as much as I have:
- Unbeatable Texture — These bars hit the sweet spot between a cookie and a brownie. They’re soft and chewy in the middle with a slightly crisp edge. I’ve tested them with different flours, and all-purpose flour gives the best structure. The result is a tender crumb that melts in your mouth.
- Simple Ingredients — You probably have most of these ingredients in your kitchen right now. Flour, sugar, butter, eggs, cinnamon, and baking powder. No fancy extracts or hard-to-find spices. This simplicity allows the natural flavors to shine. It’s similar to how I approach my Biscoff cookie butter blondies, where fewer ingredients mean more flavor.
- Fast Prep Time — From start to finish, these bars take about 30 minutes. That includes mixing, spreading, and baking. I can make these after work without feeling overwhelmed. It’s a quick win for busy weeknights or last-minute gatherings.
- Perfect for Sharing — Cut into squares, these bars are easy to distribute. They’re not messy to eat, and they hold their shape well. I’ve taken them to office potlucks and family dinners, and they always disappear first. They’re a crowd-pleaser that appeals to both kids and adults.
- Freezes Well — One of my favorite things about these bars is how well they store. I make a double batch and freeze half. They thaw perfectly, retaining their soft texture. This makes them ideal for meal prep or having a ready-made dessert on hand.
This is my go-to when I need a dessert that feels special but doesn’t require hours of effort. The combination of warm spices and sweet sugar creates a comforting flavor profile that’s perfect for the fall season.
Key Ingredients for Perfect Bars
The success of these Cozy Fall Snickerdoodle Bars relies on the quality and ratio of your ingredients. Here’s what you need and why each one matters:
- All-Purpose Flour (2 1/4 cups / 280g) — This is the base of your bars. All-purpose flour provides the right amount of structure without making the bars tough. Don’t substitute with cake flour, as it will make them too delicate. I always spoon and level my flour to avoid packing it in.
- Unsalted Butter (1 cup / 226g) — Butter adds richness and flavor. Use real butter, not margarine. Soften it to room temperature before mixing. This ensures it creams properly with the sugar, creating air pockets that make the bars light.
- Granulated Sugar (1 1/2 cups / 300g) — Sugar sweetens and helps with browning. For the coating, use extra granulated sugar mixed with cinnamon. This creates the signature crunchy exterior. I prefer white sugar for its clean sweetness.
- Ground Cinnamon (2 teaspoons / 10g) — Cinnamon is the star of this show. Use fresh, high-quality cinnamon for the best flavor. Old cinnamon loses its potency, so check your spice jar. The aroma alone is worth the effort.
- Large Eggs (2 large / 100g) — Eggs bind the ingredients and add moisture. Bring them to room temperature before using. This helps them incorporate evenly into the batter. Room temperature eggs also help the batter rise better.
- Vanilla Extract (1 teaspoon / 5ml) — Vanilla enhances the other flavors. Use pure vanilla extract, not imitation. A little goes a long way in adding depth to the sweetness.
- Baking Powder (1 teaspoon / 5g) — This leavening agent helps the bars rise. Make sure it’s fresh for maximum effectiveness. Old baking powder won’t give you the lift you need.
- Salt (1/2 teaspoon / 3g) — Salt balances the sweetness. It’s easy to overlook, but it’s crucial for bringing out the cinnamon flavor. Don’t skip it.
For the cinnamon-sugar coating, mix 1/4 cup (50g) granulated sugar with 1 tablespoon (6g) ground cinnamon. This ratio gives the perfect balance of spice and sweetness. You can adjust it to your taste, but I find this combination works best.
Tools You’ll Need
You don’t need fancy equipment to make these bars. Here’s what I use:
- 8×8 Inch Baking Pan — This size gives the bars the right thickness. Line it with parchment paper for easy removal. I use a pan with straight sides for clean cuts.
- Mixing Bowls — One large bowl for the wet ingredients and one medium for the dry. I have a set of stainless steel bowls that are durable and easy to clean.
- Electric Mixer — Handheld or stand mixer works. Creaming the butter and sugar takes effort, so a mixer saves time and ensures a smooth batter.
- Spatula — A rubber spatula helps scrape the bowl and fold in the flour. It’s essential for incorporating all ingredients evenly.
- Pastry Brush — Optional, but useful for brushing melted butter on top before adding the cinnamon sugar. It ensures an even coating.
These tools are basic kitchen staples. If you don’t have an electric mixer, you can use a wooden spoon, but it will take more elbow grease. The key is to mix until the batter is smooth and consistent.
How to Make Cozy Fall Snickerdoodle Bars
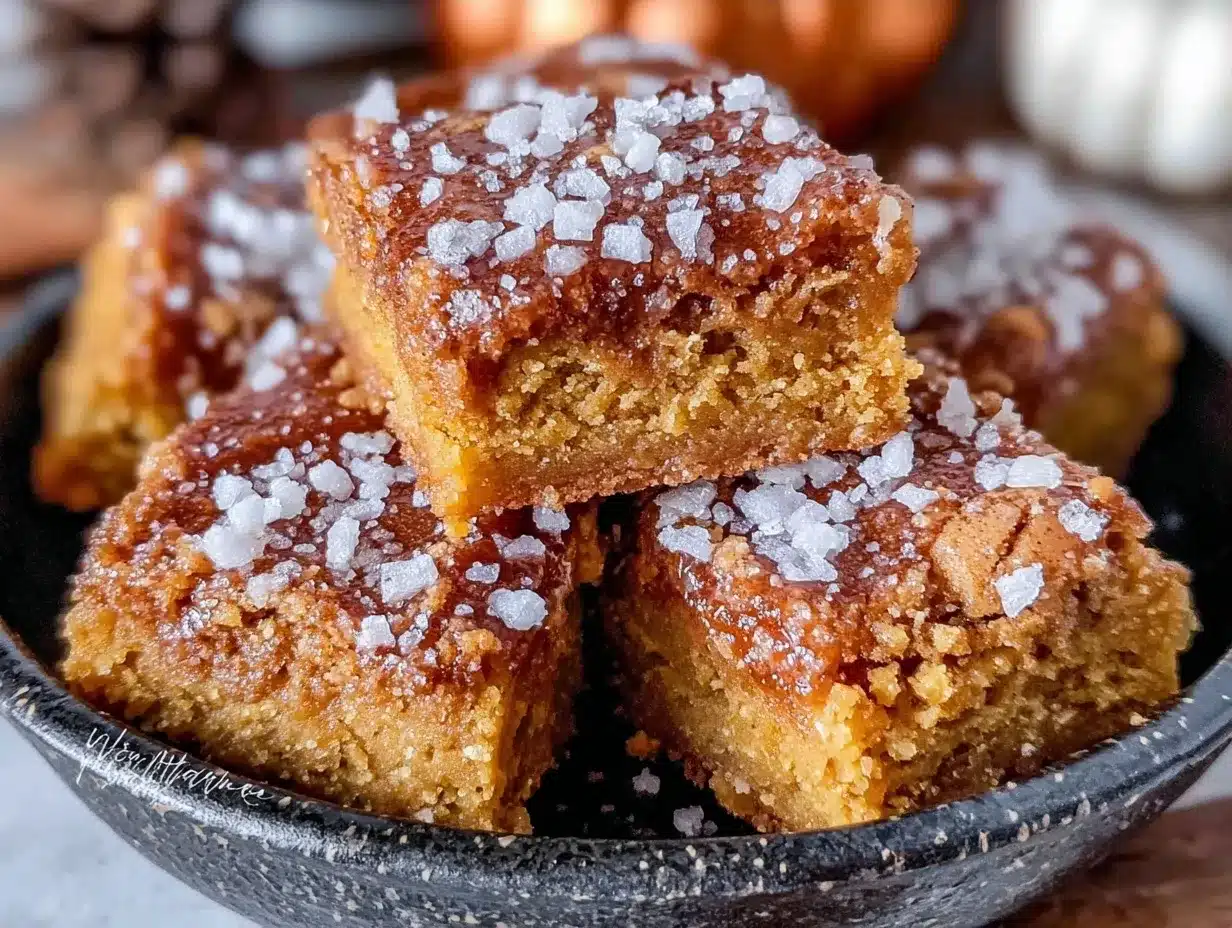
Let’s get baking! I’m walking you through exactly how I make these bars, step by step.
Step 1: Prep Your Pan and Oven (5 minutes)
Preheat your oven to 350°F (175°C). Line an 8×8 inch baking pan with parchment paper, leaving an overhang on the sides. This makes it easy to lift the bars out after baking. Grease the parchment lightly with butter or non-stick spray. This prevents sticking and ensures easy removal.
Step 2: Cream Butter and Sugar (3 minutes)
In a large mixing bowl, beat the softened butter and granulated sugar together until light and fluffy. This should take about 2-3 minutes with an electric mixer. The mixture should look pale and creamy. This step incorporates air into the batter, which helps the bars rise and become tender. Don’t rush this step; proper creaming is key to the texture.
Step 3: Add Eggs and Vanilla (2 minutes)
Add the eggs one at a time, beating well after each addition. Mix in the vanilla extract. The batter might look slightly curdled at this point, which is normal. Just keep mixing until it’s smooth. The eggs bind the butter and sugar together, adding moisture and structure.
Step 4: Mix Dry Ingredients (1 minute)
In a separate medium bowl, whisk together the flour, baking powder, and salt. This ensures even distribution of the leavening agent. Sifting is optional but helps remove lumps. I usually just whisk them together for about 30 seconds.
Step 5: Combine Wet and Dry (2 minutes)
Gradually add the dry ingredients to the wet mixture. Mix on low speed until just combined. Overmixing can make the bars tough, so stop as soon as no flour streaks remain. The batter will be thick and sticky. Use a spatula to fold in any remaining flour from the bottom of the bowl.
Step 6: Spread Batter and Add Topping (5 minutes)
Spread the batter evenly into the prepared pan. Use a spatula to smooth the top. In a small bowl, mix the extra granulated sugar and cinnamon. Sprinkle this mixture evenly over the batter. For an extra touch, you can drizzle a little melted butter over the sugar before sprinkling. This helps the topping adhere and creates a crispier crust.
Step 7: Bake and Cool (25-30 minutes)
Bake the bars in the preheated oven for 25-30 minutes. They are done when the edges are golden brown and the center is set but still slightly soft. A toothpick inserted into the center should come out with a few moist crumbs, not wet batter. Let the bars cool in the pan for 10 minutes, then transfer to a wire rack to cool completely. This cooling time allows the flavors to meld and the texture to set.
Total time: 30 minutes prep and baking, plus 30 minutes cooling. The waiting is the hardest part, but it’s worth it.
Expert Tips for Success
Here’s everything I learned from making these bars too many times. These tips will help you avoid common mistakes and achieve the best results.
The Game-Changers:
- Room Temperature Ingredients — This is non-negotiable. Cold butter won’t cream properly, and cold eggs will seize the batter. Take your butter and eggs out of the fridge 30 minutes before you start. If you forget, you can soften butter in the microwave for 10-second bursts.
- Don’t Overmix — Once you add the flour, mix just until combined. Overmixing develops gluten, which makes the bars chewy and tough instead of tender. I’ve made this mistake more than once, and the texture was noticeably denser.
- Check Early — Ovens vary, so start checking at 25 minutes. If the edges are browning too quickly, cover the pan with foil. Underbaking is better than overbaking for these bars; they continue to cook as they cool.
Common Problems & Solutions:
- Bars are too flat — This usually means the butter was too warm or the baking powder was old. Ensure your butter is soft but not melted, and use fresh baking powder.
- Topping isn’t sticking — Make sure the batter is slightly tacky before adding the sugar. If it’s too dry, brush with a little melted butter first.
- Bars are dry — Overbaking is the culprit. Remove them from the oven when the center still looks slightly underdone. They will firm up as they cool.
Pro Tricks:
- Add a Cream Cheese Layer — For a twist, spread a thin layer of sweetened cream cheese on the batter before adding the cinnamon sugar. It adds a tangy contrast to the sweet bars.
- Use Brown Butter — For a deeper flavor, brown your butter before creaming. Let it cool to room temperature before using. This adds a nutty complexity that pairs beautifully with cinnamon.
Recipe Variations
Once you’ve nailed the basic version, here’s how to mix it up. These variations keep things interesting and allow you to customize the bars to your taste.
Apple Cinnamon Bars
Add 1 cup of diced tart apples to the batter. Toss them in a little flour first to prevent sinking. The apples add moisture and a fresh crunch. This variation is perfect for early fall when apples are at their peak.
Maple Pecan Bars
Replace 1/2 cup of flour with chopped pecans. Add 1 tablespoon of maple syrup to the wet ingredients. The nuts add crunch and the maple adds warmth. This is a great option for those who love nutty flavors.
Chocolate Chip Swirl
Drop spoonfuls of chocolate chip cookie dough on top of the batter before sprinkling the cinnamon sugar. The contrast of chocolate and cinnamon is delicious. This is a fun way to combine two favorite desserts.
Dairy-Free Option
Use a dairy-free butter alternative and omit the cream cheese layer if using. The bars will still be delicious, though the texture might be slightly denser. Check your baking powder to ensure it’s dairy-free.
Gluten-Free Option
Substitute the all-purpose flour with a 1:1 gluten-free flour blend. Add 1/4 teaspoon of xanthan gum if your blend doesn’t include it. This ensures the bars have the right structure. The texture will be similar to the original.
Serving & Storage
Serving: These bars are best served at room temperature. They pair well with a cup of coffee or tea. I like to garnish them with a light dusting of powdered sugar for a decorative touch. They also go well with a scoop of vanilla ice cream or a dollop of whipped cream.
Storage: Store the bars in an airtight container at room temperature for up to 3 days. They can also be refrigerated for up to 5 days, though they may become slightly firmer. To restore softness, let them sit at room temperature for 30 minutes before eating.
Freezing: These bars freeze beautifully. Wrap them tightly in plastic wrap and then in aluminum foil. They can be frozen for up to 3 months. Thaw them at room temperature or in the refrigerator overnight. I often freeze them in individual portions for a quick snack.
Meal Prep Tips: Make a double batch and freeze half. This saves time during busy weeks. You can also assemble the bars ahead of time and refrigerate the unbaked batter for up to 24 hours. Let them come to room temperature before baking for even cooking.
Nutrition Information
I’m not a nutritionist, but here’s the breakdown per bar (assuming 16 bars):
| Nutrient | Amount |
|---|---|
| Calories | 220 |
| Protein | 3g |
| Carbs | 32g |
| Fiber | 1g |
| Fat | 10g |
| Sodium | 120mg |
My Take: These are indulgent treats, high in sugar and carbs. They’re best enjoyed in moderation as a dessert or special snack. While not a health food, they’re better than store-bought cookies because you control the ingredients. I try to balance them with a protein-rich drink or fruit to make a more complete snack.
Final Thoughts
These Cozy Fall Snickerdoodle Bars are more than just a recipe; they’re a seasonal ritual for me. They capture the warmth and comfort of autumn in a single bite. I hope you enjoy making them as much as I do. Feel free to experiment with the variations and make them your own. If you try this recipe, I’d love to hear how it turns out. Drop a comment below with your thoughts or share a photo of your creation.
Happy cooking!
FAQs
Can I use self-rising flour instead of all-purpose flour?
It’s not recommended. Self-rising flour contains baking powder and salt, which can alter the leavening and taste. Stick with all-purpose flour for the best texture. If you must substitute, reduce the baking powder and salt in the recipe, but it’s safer to use the specified flour.
Why did my bars turn out cakey?
This usually happens if you overmix the batter or use too much flour. Make sure you’re spooning and leveling your flour, not scooping it directly from the bag. Also, avoid overmixing once the flour is added. Mix just until combined.
Can I make these bars in a 9×13 pan?
Yes, but you’ll need to double the recipe. The baking time will also increase, so check them around 35-40 minutes. Keep an eye on the edges to prevent overbrowning.
How do I store leftover bars?
Store them in an airtight container at room temperature for up to 3 days. For longer storage, refrigerate for up to 5 days or freeze for up to 3 months. They retain their texture well when stored properly.
Can I add nuts to the batter?
Absolutely! Chopped walnuts or pecans add a nice crunch and flavor. Add 1/2 to 1 cup of nuts to the batter. Toss them in a little flour first to prevent sinking.
Is it okay to use margarine instead of butter?
It’s best to use real butter for the best flavor and texture. Margarine has a higher water content, which can affect the creaming process and the final texture. If you must use margarine, choose a stick variety, not a spread.
Can I make these bars ahead of time?
Yes, you can prepare the batter and refrigerate it for up to 24 hours. Let it come to room temperature before baking. You can also bake the bars ahead of time and store them as directed. They taste just as good the next day.
Pin This Recipe!
Cozy Fall Snickerdoodle Bars
- Total Time: 45 minutes
- Yield: 16 servings 1x
Description
Soft, pillowy bars with a chewy center and crisp edges, coated in a signature cinnamon-sugar swirl. These easy-to-make bars capture the essence of autumn with simple ingredients and are perfect for sharing or meal prep.
Ingredients
- 2 1/4 cups (280g) all-purpose flour
- 1 cup (226g) unsalted butter, softened to room temperature
- 1 1/2 cups (300g) granulated sugar
- 2 large eggs, room temperature
- 1 teaspoon vanilla extract
- 1 teaspoon baking powder
- 1/2 teaspoon salt
- 1/4 cup (50g) granulated sugar (for coating)
- 1 tablespoon (6g) ground cinnamon (for coating)
Instructions
- Preheat oven to 350°F (175°C). Line an 8×8 inch baking pan with parchment paper, leaving an overhang on the sides, and grease lightly.
- In a large mixing bowl, beat the softened butter and 1 1/2 cups granulated sugar together until light and fluffy, about 2-3 minutes.
- Add the eggs one at a time, beating well after each addition. Mix in the vanilla extract until smooth.
- In a separate medium bowl, whisk together the flour, baking powder, and salt.
- Gradually add the dry ingredients to the wet mixture, mixing on low speed until just combined. Do not overmix.
- Spread the batter evenly into the prepared pan. In a small bowl, mix the extra 1/4 cup granulated sugar and 1 tablespoon cinnamon. Sprinkle this mixture evenly over the batter.
- Bake for 25-30 minutes, or until edges are golden brown and the center is set but slightly soft. Let cool in the pan for 10 minutes, then transfer to a wire rack to cool completely.
Notes
Ensure ingredients are at room temperature for best texture. Do not overmix the batter to avoid tough bars. Bars freeze well for up to 3 months. For a variation, try adding diced apples, maple pecans, or a cream cheese layer.
- Prep Time: 15 minutes
- Cook Time: 30 minutes
- Category: Dessert
- Cuisine: American
Nutrition
- Serving Size: 1 bar
- Calories: 220
- Sugar: 24
- Sodium: 120
- Fat: 10
- Saturated Fat: 6
- Carbohydrates: 32
- Fiber: 1
- Protein: 3
Keywords: snickerdoodle bars, fall baking, cinnamon sugar bars, easy dessert, seasonal recipes, autumn treats, bar cookies


