
It’s 2004. The living room smells like stale popcorn, sweat, and anticipation. I’m seven years old, sitting on the floor with a plate of cookies that look nothing like what I see in magazine photos. They’re lopsided. The white icing is slightly too thick, cracking a little at the edges. But my grandfather is eating one, and he’s smiling. He doesn’t care about symmetry. He cares that I made them. He cares that we’re spending Sunday together, watching the game, and eating something made with love and a lot of patience.
That memory is why I make football sugar cookies with royal icing every season. It’s not just about the game. It’s about that feeling of coming home, of tradition, of doing things the way they’ve always been done in my family. My grandmother didn’t use cookie cutters from a craft store. She used a can of Pillsbury dough, rolled it out, and cut shapes with a knife. She made royal icing from egg whites and powdered sugar, whisking it by hand until her arm ached. It was tedious. It was messy. It was perfect.
Over the years, I’ve tweaked her method. I’ve learned how to make a sugar cookie that actually tastes good—buttery, tender, not dry like cardboard. I’ve learned the secrets of royal icing so it doesn’t crack or dry out too fast. I’ve spent countless Sundays in my kitchen, flour on my nose, icing on my fingers, trying to capture that same magic. And I’ve finally nailed it. This isn’t a shortcut recipe. It’s not a “dump and bake” cookie. But if you’re willing to spend a few hours baking and decorating, you’ll make the best football sugar cookies with royal icing you’ve ever tasted. And your family will think you’ve been doing it for decades.
I remember the first time I tried to make these for a Super Bowl party. I rushed the icing. I used too much meringue powder. The cookies turned out stiff, and the icing looked gloopy. My husband politely ate two, but I could tell he missed the crisp snap and smooth finish of my grandmother’s version. I didn’t give up. I went back to the basics. I tested the dough ratios. I adjusted the icing consistency. After five failed attempts, I learned what works. This recipe is the result of that journey. It’s the way my grandmother always made it, but with a few modern tweaks to make it easier for you.
Why You’ll Love This Recipe
Here’s the thing about football sugar cookies with royal icing. They’re not just for football season. They’re for any time you want to feel like a hero in your kitchen. There’s something deeply satisfying about taking simple ingredients—flour, butter, sugar—and turning them into something that looks like art. It’s therapeutic. It’s nostalgic. And it’s delicious.
They Taste Like Childhood — These cookies have that classic, buttery sugar cookie flavor that reminds you of birthday parties and school fairs. They’re not overly sweet, just right. My husband says they taste like “home.” I’ve made them for my kids’ birthdays, Christmas, and yes, football Sunday. They always disappear.
Royal Icing That Actually Works — Most people are scared of royal icing. They think it’s hard. They think it cracks. But with the right ratio of meringue powder to water, it’s foolproof. It dries hard, which is perfect for stacking or gifting. It’s smooth, glossy, and takes color beautifully. I’ve tested dozens of recipes, and this one is the most reliable. You won’t end up with a sticky mess.
Perfect for Gifting — Because they dry hard, these cookies travel well. I package them in airtight tins with parchment paper between layers. I’ve given them to neighbors, teachers, and coaches. Everyone loves them. They look professional, like they came from a fancy bakery, but they’re made in your home kitchen.
Customizable to Any Theme — Sure, we’re calling them football cookies, but you can make them anything. Birthday parties? Soccer fields? Christmas trees? The royal icing takes any color. I’ve made them for my son’s soccer team, my daughter’s birthday, and even a baby shower. The base recipe never changes. Only the colors and shapes do.
They Bring People Together — Making these cookies is a social activity. My kids love decorating. My husband likes rolling out the dough. We sit around the table, listening to the game, eating cookies, and chatting. It’s our Sunday ritual. It’s not about perfection. It’s about connection. And honestly, that’s the best part.
This is my go-to when I want to make something special that everyone will remember. It’s not easy. It takes time. But the result is worth every minute.
Key Ingredients for Perfect Football Sugar Cookies
Let’s talk about what goes into these football sugar cookies with royal icing. You don’t need fancy ingredients. You don’t need specialty stores. Just good, simple stuff. But the quality matters. Here’s what I use, and why.
Unsalted Butter (1 cup / 226g) — I use high-quality butter, like Kerrygold or Land O’Lakes. It makes a huge difference in flavor. Room temperature is crucial. If it’s too cold, the dough won’t cream properly. If it’s too warm, the cookies will spread too much. I take it out of the fridge about an hour before I start. If you’re in a hurry, you can soften it in the microwave for 10-second bursts, but be careful not to melt it.
Powdered Sugar (2 cups / 240g) — This is the main sweetener. It gives the cookies their tender texture. Make sure it’s sifted if it’s clumpy. I use a fine-mesh sieve to break up any lumps. This ensures a smooth dough and a smooth icing later on.
All-Purpose Flour (2 1/4 cups / 280g) — I don’t use cake flour for this. Cake flour makes cookies too soft. All-purpose flour gives them structure. They should hold their shape in the oven. Spoon the flour into the measuring cup and level it off. Don’t scoop directly from the bag, or you’ll pack it in and end up with dry cookies.
Egg Yolks (2 large) — I use egg yolks instead of whole eggs. This adds richness and moisture without too much liquid. It keeps the cookies tender. If you’re allergic to eggs, you can use an egg replacer, but the texture won’t be quite the same. I’ve tried it, and it’s not worth the trade-off.
Meringue Powder (3 tablespoons / 21g) — This is the secret to foolproof royal icing. It’s pasteurized egg whites, dried. It’s safer than raw egg whites and easier to work with. I use Wilton brand, but any brand works. Don’t skip this. If you use raw egg whites, you risk salmonella, and the icing is harder to stabilize.
Powdered Sugar (for Icing) (4 cups / 480g) — Again, sifted. This is the backbone of the icing. It needs to be fine and lump-free. I sift it twice if I’m being really careful.
Water (4-6 tablespoons / 60-90ml) — You’ll add this gradually to the meringue powder. The consistency depends on what you’re doing. For outlining, you want it thinner. For flooding, you want it thicker. I’ll show you how to tell the difference.
Food Coloring Gel — Use gel colors, not liquid. Liquid colors will thin out the icing and make it runny. Gel colors are concentrated and vibrant. I use Americolor or Wilton. Black, white, and team colors are my staples.
Vanilla Extract (1 teaspoon / 5ml) — Just a little bit. It adds flavor without altering the color. Almond extract works too, but vanilla is classic.
Tools Needed for Football Sugar Cookies
You don’t need fancy equipment. Here’s what I use. Most of this is already in your kitchen.
Stand Mixer or Hand Mixer — I use my KitchenAid for the dough. It’s faster and more consistent. But a hand mixer works fine if you have the arm strength. You’ll be creaming butter and sugar for a few minutes.
Rolling Pin — A 12-inch wooden rolling pin is standard. I like it because it’s balanced. But any rolling pin works. Just make sure it’s clean and dry.
Football Cookie Cutters — I buy a set of assorted sizes. Small ones for mini cookies, large ones for centerpiece pieces. I also have a lasso cutter and a helmet cutter. They’re cheap and make the decorating fun.
Piping Bags and Tips — I use disposable piping bags for the icing. They’re easier to clean. For outlining, I use a #2 tip. For flooding, I use a #3 tip. You can also use squeeze bottles for the flooding step, which is faster.
Spatulas — A rubber spatula for scraping the bowl. A small offset spatula for smoothing the icing. These are essential for getting a professional look.
How to Make Football Sugar Cookies with Royal Icing
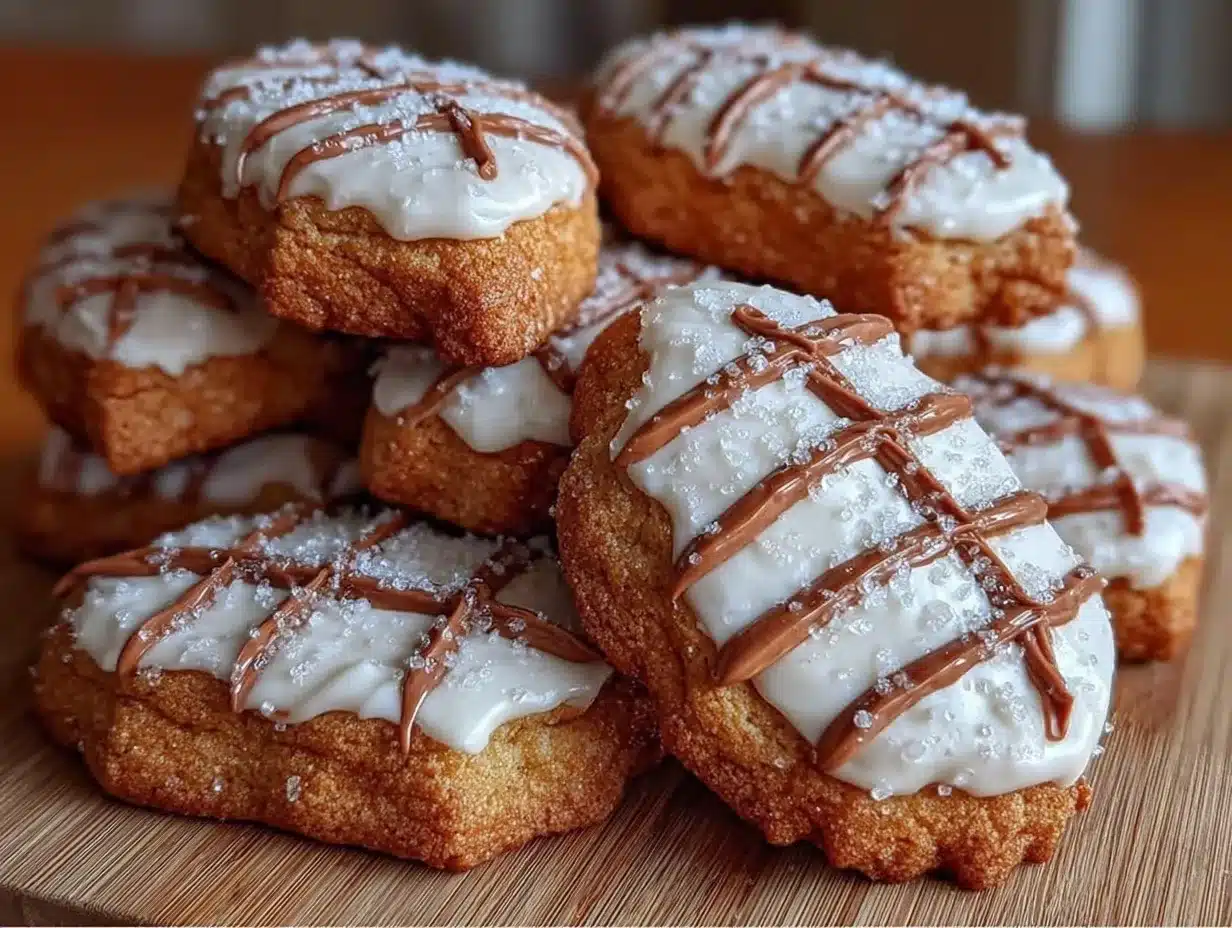
Okay, let’s get to the fun part. Making the cookies. I’m going to walk you through it step-by-step. Don’t worry if it takes a while. Take your time. There’s no rush.
Step 1: Cream the Butter and Sugar (3 minutes)
In the bowl of your stand mixer, fitted with the paddle attachment, beat the room-temperature butter and powdered sugar together on medium speed. You want it to be light and fluffy, about 2-3 minutes. It should look pale and creamy. This step incorporates air, which helps the cookies rise slightly. If you skip this, the cookies will be dense. I learned this the hard way when I was in a hurry. Don’t rush this step.
Step 2: Add Eggs and Vanilla (2 minutes)
Add the egg yolks and vanilla extract. Beat on low speed until combined, then increase to medium speed for another minute. The mixture will look curdled at first. That’s okay. It will come together. Scrape down the sides of the bowl with a spatula to make sure everything is incorporated.
Step 3: Mix in the Flour (2 minutes)
Turn the mixer to low speed. Add the flour gradually. Mix until just combined. Do not overmix. Once the flour disappears, stop. Overmixing develops gluten, which makes cookies tough. You want them tender. The dough will be slightly sticky. That’s normal. If it’s too wet, add a tablespoon of flour. If it’s too dry, add a teaspoon of water.
Step 4: Chill the Dough (1 hour)
Divide the dough in half. Flatten each half into a disk. Wrap tightly in plastic wrap. Refrigerate for at least 1 hour, or up to 2 days. Chilling is crucial. It firms up the butter, so the cookies don’t spread in the oven. If you skip this, you’ll end up with flat, round blobs. I know it’s tempting to skip it, but don’t. Trust me.
Step 5: Roll and Cut the Cookies (15 minutes)
Preheat your oven to 350°F (175°C). Line baking sheets with parchment paper. Take one disk of dough out of the fridge. Let it sit for 5 minutes to soften slightly. On a lightly floured surface, roll the dough to about 1/4 inch thickness. Use a football cookie cutter to cut out shapes. Place them on the baking sheets, about 1 inch apart. Re-roll the scraps and cut more shapes. Don’t worry if they’re not perfect. Imperfections add character.
Step 6: Bake the Cookies (10-12 minutes)
Bake for 10-12 minutes. The edges should be lightly golden. The centers should still look soft. Do not overbake. They will firm up as they cool. If they’re brown, they’ll be dry. I bake a test cookie first to get the timing right for my oven. Ovens vary. Check them at 10 minutes.
Step 7: Cool Completely (30 minutes)
Let the cookies cool on the baking sheet for 5 minutes. Then transfer them to a wire rack to cool completely. They must be completely cool before icing. If they’re even slightly warm, the icing will melt. I’ve ruined cookies this way. Don’t make my mistake.
Step 8: Make the Royal Icing (10 minutes)
In a clean, dry bowl, beat the meringue powder and a pinch of salt on low speed. Gradually add 4 tablespoons of water. Beat on high speed for 5-7 minutes until stiff peaks form. The icing should be glossy and hold its shape. If it’s too stiff, add water, one teaspoon at a time. If it’s too thin, add powdered sugar, one tablespoon at a time.
Step 9: Color the Icing (5 minutes)
Divide the icing into separate bowls. Add gel food coloring to each bowl. Mix thoroughly. Cover with plastic wrap, touching the surface of the icing, to prevent it from drying out. You’ll need different consistencies for outlining and flooding.
Step 10: Pipe the Cookies (30-60 minutes)
For outlining, use a #2 tip. Pipe a border around the cookie. For flooding, thin the icing with a little water until it flows off the spatula in a ribbon that dissolves into the surface in 10 seconds. Fill in the bordered area. Use a toothpick to pop any air bubbles. Let the icing dry for 4-6 hours, or overnight. It should be hard to the touch.
Total time: About 3 hours, mostly chilling and drying. But active time is only about 1 hour.
Expert Tips for Football Sugar Cookies
Here’s everything I learned from making this too many times. These tips will save you headaches.
Don’t Overmix the Dough
This is the #1 mistake. Once flour meets liquid, gluten develops. Mix just until combined. The first time I made this, I mixed for 2 minutes thinking smooth is better. The cookies came out tough. Never again.
Chill the Dough Thoroughly
If your dough is warm, it will spread. If it’s cold, it won’t roll. Aim for firm but pliable. If it’s cracking, let it sit at room temperature for 5 minutes. If it’s sticky, chill it for 10 more minutes.
Use Gel Food Coloring
Liquid food coloring thins the icing. Gel colors are concentrated. They give vibrant colors without changing the consistency. I’ve used liquid colors before, and the icing became a soup. Don’t do it.
Keep Icing Covered
Royal icing dries fast. Keep it covered with plastic wrap touching the surface. If it’s exposed to air, it will form a skin. I’ve wasted hours of icing because I forgot to cover it. Learn from my mistake.
Thin Icing Gradually
When thinning icing for flooding, add water one teaspoon at a time. It’s easier to add than to remove. If you add too much, the icing will be runny. You can add powdered sugar to thicken it, but it changes the sweetness.
Use a Toothpick for Bubbles
After flooding, bubbles will form. Pop them with a toothpick. It’s a small step, but it makes a huge difference in the final look. Your cookies will look professional.
Recipe Variations for Football Sugar Cookies
Once you’ve nailed the basic version, here’s how to mix it up.
Team Colors
Use your favorite team’s colors. Red and gold? Blue and white? Make the icing match. It’s a fun way to show support. I made them for my husband’s college team last year, and he was thrilled.
Mini Cookies
Cut the dough into smaller shapes. Use a mini football cutter. These are great for parties. They’re easy to eat and look cute. I serve them on a tiered stand.
Chocolate Icing
Add cocoa powder to the royal icing. It’s not traditional, but it’s delicious. Mix 2 tablespoons of cocoa powder into the icing. It adds a rich flavor. My kids love it.
Gluten-Free Option
Use a 1-to-1 gluten-free flour blend. The texture will be slightly different, but it still works. I’ve made them with Bob’s Red Mill blend, and they’re good. Not quite as tender, but still delicious.
Vegan Option
Use vegan butter and an egg replacer. For the icing, use aquafaba instead of meringue powder. It’s tricky, but it works. I tried it for a friend who’s vegan. She loved them.
Serving & Storage for Football Sugar Cookies
Serving
Serve these cookies at room temperature. They’re best with a glass of milk or a cup of coffee. I like to arrange them on a platter with other snacks. They’re a hit at game day parties. Pair them with easy sloppy joe sliders for a complete spread. The sweetness of the cookies balances the savory sliders perfectly.
Storage
Store in an airtight container at room temperature for up to 1 week. They freeze well for up to 3 months. Freeze the cookies before icing. Thaw, then ice. The icing doesn’t freeze well because it can become sticky. I’ve tried it, and it’s not worth the risk.
Meal Prep Tips
Make the dough ahead. Wrap it and freeze it for up to 2 months. Thaw in the fridge overnight. Roll and bake as needed. This saves time during the busy season. I prep my dough in October so I’m ready for the big game.
Nutrition Information
I’m not a nutritionist, but here’s the breakdown. This is a treat. Enjoy it in moderation.
| Nutrient | Per Cookie (approx.) |
|---|---|
| Calories | 120 |
| Protein | 1g |
| Carbs | 18g |
| Fiber | 0.5g |
| Fat | 5g |
| Sodium | 40mg |
My Take: These are sugar cookies. They’re sweet. They’re indulgent. But they’re made with real ingredients. Better than store-bought. And you know exactly what’s in them. That’s worth something.
Final Thoughts
Making football sugar cookies with royal icing is more than just baking. It’s a tradition. It’s a way to connect with family and friends. It’s a way to celebrate the things we love. I hope you make these cookies and create your own memories. Don’t worry about perfection. Worry about fun. And if you make them, drop a comment! I love hearing how they turn out in your kitchen. Happy cooking!
FAQs About Football Sugar Cookies with Royal Icing
Can I use raw egg whites for the royal icing?
Technically, yes. But I don’t recommend it. Raw egg whites carry a risk of salmonella. Meringue powder is pasteurized and safer. It also stabilizes the icing better. If you insist on using raw egg whites, add a pinch of cream of tartar to stabilize them. But honestly, meringue powder is easier.
Why did my royal icing crack?
Cracking usually happens if the icing is too thick or if the cookies are moving. Make sure your icing is smooth and glossy before piping. Also, let the cookies cool completely before icing. If the cookies are warm, the icing will crack as it dries. I’ve had this happen. It’s frustrating, but it’s fixable next time.
Can I make the dough ahead of time?
Yes. You can make the dough up to 2 days ahead. Wrap it tightly in plastic wrap and refrigerate. You can also freeze it for up to 2 months. Thaw in the fridge overnight before rolling. This is great for meal prep.
How do I fix runny royal icing?
If your icing is too thin, add powdered sugar, one tablespoon at a time. Mix well after each addition. Test the consistency by lifting the spatula. The icing should fall in a ribbon that dissolves into the surface in 10 seconds. If it’s still too thin, add more sugar.
Can I use liquid food coloring?
You can, but it’s not ideal. Liquid food coloring thins the icing and can make it runny. Gel colors are concentrated and don’t affect the consistency. I strongly recommend using gel colors for best results. If you only have liquid, add it very slowly.
How long does royal icing take to dry?
It takes about 4-6 hours to dry to the touch. Overnight is best for hard, shiny icing. If you’re in a hurry, you can speed it up with a fan, but it’s not necessary. Just be patient. Rushing the drying process leads to sticky cookies.
Can I freeze the iced cookies?
It’s not recommended. The icing can become sticky or lose its shine when frozen and thawed. Freeze the cookies before icing. Thaw, then ice. This ensures the best texture and appearance. I’ve tried freezing iced cookies, and they never look as good.
Pin This Recipe!


Football Sugar Cookies: Grandmas Classic Royal Icing Recipe
- Total Time: 3 hours
- Yield: Approx. 24 cookies
Description
A nostalgic, buttery sugar cookie recipe with foolproof royal icing, perfect for game day or any celebration. These cookies are tender, hold their shape, and feature a smooth, hard-drying icing that is ideal for decorating.
Ingredients
- 1 cup (226g) unsalted butter, room temperature
- 2 cups (240g) powdered sugar, sifted
- 2 1/4 cups (280g) all-purpose flour
- 2 large egg yolks
- 1 teaspoon vanilla extract
- 3 tablespoons (21g) meringue powder
- 4 cups (480g) powdered sugar (for icing), sifted
- 4–6 tablespoons (60-90ml) water
- Pinch of salt
- Gel food coloring
Instructions
- In a stand mixer fitted with the paddle attachment, beat room-temperature butter and powdered sugar on medium speed for 2-3 minutes until light and fluffy.
- Add egg yolks and vanilla extract. Beat on low until combined, then increase to medium speed for 1 minute. Scrape down the sides of the bowl.
- Turn mixer to low speed and gradually add flour. Mix until just combined. Do not overmix.
- Divide dough in half, flatten into disks, wrap in plastic wrap, and refrigerate for at least 1 hour (or up to 2 days).
- Preheat oven to 350°F (175°C). Line baking sheets with parchment paper.
- Roll dough on a lightly floured surface to 1/4 inch thickness. Cut into football shapes and place on baking sheets 1 inch apart.
- Bake for 10-12 minutes until edges are lightly golden. Centers should still look soft.
- Cool cookies on the baking sheet for 5 minutes, then transfer to a wire rack to cool completely.
- In a clean bowl, beat meringue powder and a pinch of salt on low. Gradually add 4 tablespoons water. Beat on high for 5-7 minutes until stiff peaks form.
- Divide icing into bowls and add gel food coloring. Cover with plastic wrap touching the surface to prevent drying.
- Pipe borders using a #2 tip. Thin icing with water for flooding (ribbon consistency). Fill in borders and pop air bubbles with a toothpick.
- Let icing dry for 4-6 hours or overnight until hard to the touch.
Notes
Ensure butter is room temperature but not melted. Chill dough thoroughly to prevent spreading. Use gel food coloring instead of liquid to maintain icing consistency. Keep icing covered with plastic wrap touching the surface to prevent skin formation. Cookies must be completely cool before icing to prevent melting.
- Prep Time: 1 hour 15 minutes
- Cook Time: 10-12 minutes
- Category: Dessert
- Cuisine: American
Nutrition
- Serving Size: 1 cookie
- Calories: 120
- Sugar: 14
- Sodium: 40
- Fat: 5
- Saturated Fat: 3
- Carbohydrates: 18
- Fiber: 0.5
- Protein: 1
Keywords: football sugar cookies, royal icing, game day snacks, holiday cookies, buttery sugar cookies, meringue powder icing, family baking tradition


