It was 6:45 PM on a Tuesday, and I was staring into the abyss of my pantry. You know the one. It looks full, but everything in there is either expired or requires a recipe I don’t have the energy to find. I was hungry, my kids were hungry, and the idea of waiting 45 minutes for the oven to heat up and roast vegetables sounded like a punishment.
I had a package of ground beef sitting in the fridge that I had forgotten about since Sunday. I also had a bag of white rice that was slowly turning into a rock-solid block in the back of the cupboard. Normally, I’d just order takeout and call it a night. But that night, I decided to throw them together in a single skillet with whatever spices were hanging around.
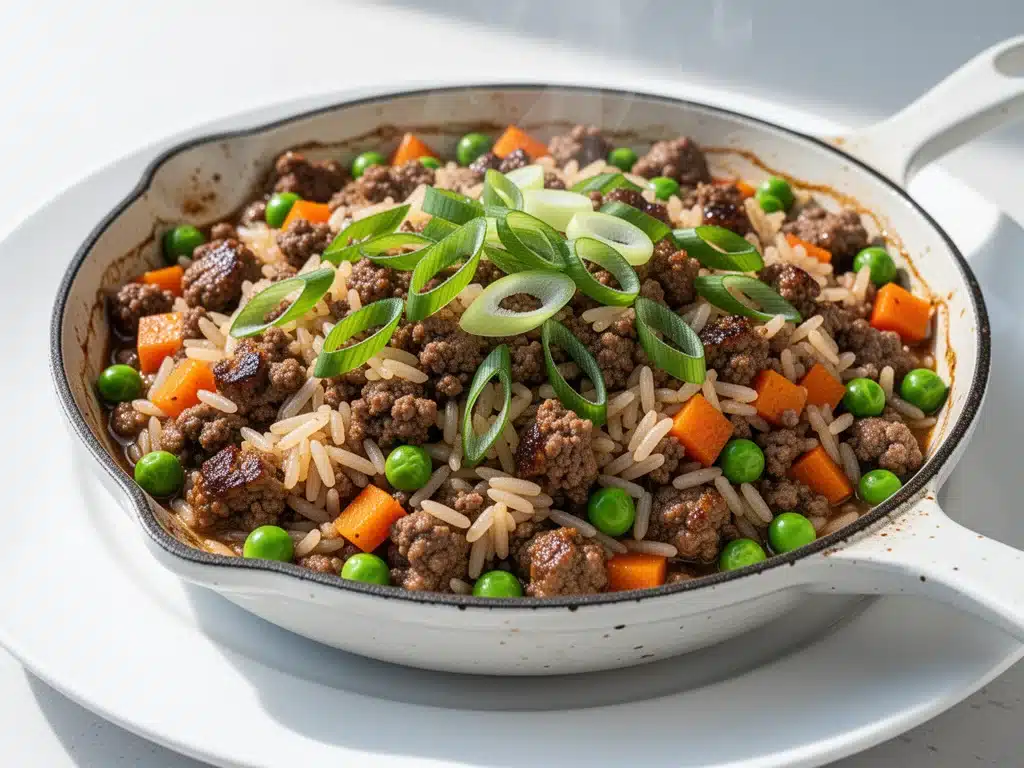
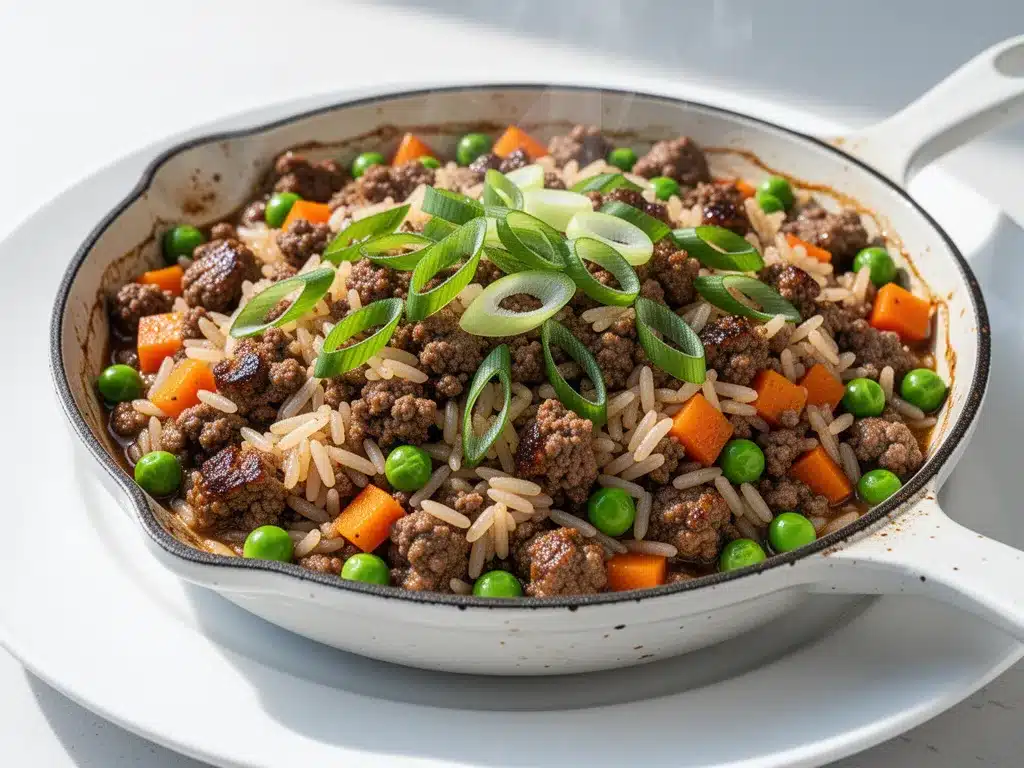
I expected mush. I expected bland, salty rice that tasted like it had been cooked in dishwater. Instead, I got something that surprised me. The rice absorbed the beefy, savory juices, the beef stayed tender, and everything came together in about 25 minutes. It wasn’t fancy. It wasn’t gourmet. But it was high protein, incredibly filling, and tasted like comfort food without the guilt.
That accidental dinner became the foundation for this High Protein Ground Beef and Rice Skillet. I’ve tested it at least a dozen times since that chaotic Tuesday, tweaking the liquid ratios, the spice blends, and the timing until it was foolproof. It’s become my go-to for those “what’s for dinner?” moments when I need something fast, healthy, and actually delicious. If you’re tired of dry chicken breasts and boring salads, this skillet is about to change your weeknight life.
Why You’ll Love This High Protein Ground Beef and Rice Skillet
There are a few reasons I keep making this recipe, but they all boil down to one thing: it just works. Here’s the real deal on why this High Protein Ground Beef and Rice Skillet deserves a permanent spot in your rotation.
One Pan, Zero Drama — Seriously, if you hate doing dishes, this is your best friend. I brown the beef, cook the rice, and mix it all in the same skillet. No boiling rice in a separate pot, no browning meat in a second pan. Just one skillet, one spoon, and easy cleanup. I can handle a skillet. I cannot handle a sink full of pots.
Protein-Packed and Filling — This isn’t just a carb-fest. The ground beef provides a solid hit of protein, and the rice keeps you full for hours. I’ve had this for lunch the next day, and I wasn’t starving by 3 PM. It’s the kind of meal that actually fuels you.
Stupid Simple — You don’t need to be a chef to make this. I’ve walked my teenage son through it over FaceTime while I was at work. He got it right on the first try. If you can chop an onion and stir a pot, you can make this.
Budget-Friendly — Ground beef and rice are two of the cheapest ingredients in the grocery store. This recipe feeds 4-6 people for under $15, depending on where you shop. That’s less than what I spend on a single pizza delivery.
Customizable — Hate bell peppers? Leave them out. Love cheese? Throw it on top. This recipe is a canvas, not a rulebook. I make it different ways depending on what’s in my fridge.
This is my answer to “I’m tired, I’m hungry, and I don’t want takeout.” It’s reliable, it’s hearty, and it tastes like someone actually cared about dinner (even if that someone was me, operating on zero sleep).
Ingredients You’ll Need for This Skillet
Here’s the best part: you probably have most of this already. This High Protein Ground Beef and Rice Skillet relies on simple, pantry-friendly ingredients. I’m particular about a few things, though, so pay attention to the notes.
For the Base
Ground Beef (1.5 pounds / 680g) — I use 80/20 lean-to-fat ratio. It adds flavor. If you’re strictly watching fat, 90/10 works, but the dish will be drier. You might need an extra splash of broth.
White Rice (1 cup / 200g) — I use long-grain white rice. It stays fluffy and absorbs the sauce well. Brown rice works, but you’ll need more liquid and more time (about 20 extra minutes). Don’t use instant rice; it turns to mush.
Chicken Broth (2 cups / 480ml) — Low-sodium is best so you can control the salt. Vegetable broth works if you want a lighter version, but beef broth gives it that deep, savory flavor I love.
Yellow Onion (1 medium, diced / about 150g) — Sweet onions work too, but yellow onion gives better depth. White onions are too sharp for this.
Garlic (4 cloves, minced / about 2 tablespoons) — Fresh only. Jarred garlic has a metallic taste that really shows up in simple dishes. Minced fresh garlic is worth the 2 minutes.
For the Flavor
Tomato Sauce (1 can / 15 oz / 425g) — I use a simple 15oz can of crushed tomatoes or tomato sauce. Check the label—no added sugar. I like Hunts or Muir Glen.
Worcestershire Sauce (1 tablespoon) — This is the secret ingredient. It adds umami and depth. Don’t skip it. It makes the beef taste more “beefy.”
Italian Seasoning (2 teaspoons) — Or use equal parts dried basil, oregano, and thyme. Fresh herbs work but add them at the very end.
Smoked Paprika (1 teaspoon) — Adds a subtle smokiness that balances the sweetness of the rice. Regular paprika works, but smoked is better.
Salt and Black Pepper — To taste. I start with 1 teaspoon salt and ½ teaspoon pepper, then adjust at the end.
Optional Add-ins
Bell Peppers (1 medium, diced) — Adds crunch and color. I use green peppers for a sharper taste, but red or orange are sweeter.
Black Beans (1 can / 15 oz, drained) — Adds extra protein and fiber. Great for stretching the meal.
Shredded Cheddar Cheese (1 cup / 100g) — For topping. I throw it on at the end and let it melt. It’s not optional in my house.
Fresh Cilantro (¼ cup, chopped) — For garnish. Adds freshness and brightness.
Equipment Needed
You don’t need fancy equipment for this. Here’s what I actually use.
Large Skillet or Dutch Oven — I use a 12-inch cast iron skillet. It holds heat well and browns the beef nicely. A large Dutch oven works too. Make sure it has a lid, as you’ll need it to steam the rice.
Wooden Spoon — For stirring. Silicone works too. Don’t use metal on non-stick.
Sharp Knife — For chopping onions and garlic. Dull knives make you cry more—learned this the hard way.
Cutting Board — Any size works. I use plastic for easier cleanup.
Measuring Cups and Spoons — Pretty standard stuff. Dollar store versions work fine.
Colander — If you’re adding beans or rinsing the rice (though I don’t rinse for this recipe).
How to Make It: Step-by-Step
Alright, let’s make this! I’m walking you through exactly how I do it, including the little tricks I’ve picked up.
Step 1: Prep Your Ingredients (5 minutes)
Before you start cooking, dice your onion, mince your garlic, and measure out your spices. I know it seems fussy, but it makes the actual cooking way less stressful. Once you start browning the beef, things move fast. Have your broth and tomato sauce ready to go.
Step 2: Brown the Beef (8 minutes)
Heat your large skillet over medium-high heat. Add the ground beef, breaking it up with your wooden spoon as it cooks. Cook for 6-8 minutes until browned and no pink remains. If there’s a lot of excess grease, drain it off, but leave about 1 tablespoon for flavor. Don’t over-drain; you want some fat to cook the rice in.
Step 3: Sauté the Aromatics (3 minutes)
Add the diced onion to the skillet with the beef. Cook for 2-3 minutes until softened. Add the minced garlic and cook for 1 more minute, stirring constantly. The garlic should smell amazing but not brown—browned garlic tastes bitter. This is where the flavor base starts to build.
Step 4: Add the Liquids and Rice (2 minutes)
Pour in the chicken broth, tomato sauce, Worcestershire sauce, and uncooked rice. Stir everything together, making sure the rice is submerged in the liquid. Add the Italian seasoning and smoked paprika. Stir again. The mixture will look soupy—that’s okay. It’s supposed to be.
Step 5: Simmer and Steam (15-18 minutes)
Bring the mixture to a boil, then reduce the heat to low. Cover the skillet with a tight-fitting lid. Let it simmer gently for 15-18 minutes. Do not lift the lid! You’re steaming the rice. If you peek too often, you lose the steam, and the rice won’t cook evenly. After 15 minutes, check the rice. It should be tender and the liquid should be absorbed. If it’s still crunchy, add ¼ cup more broth and cook for 5 more minutes.
Step 6: Rest and Fluff (5 minutes)
Once the rice is cooked, remove the skillet from the heat. Keep the lid on and let it rest for 5 minutes. This allows the rice to finish absorbing any remaining liquid and become fluffy. Then, uncover and fluff with a fork. If you’re adding cheese, throw it on now and cover for 1 minute to melt.
Step 7: Serve
Serve immediately, topped with fresh cilantro, extra black pepper, and a dollop of sour cream if you want. It’s hearty and delicious straight from the pan.
Total Time: About 35 minutes (10 minutes active, 25 minutes mostly hands-off)
Expert Tips & Tricks
Here’s everything I’ve learned from making this dozens of times. These tips will save you from my mistakes.
Don’t Rinse the Rice — Unlike sushi rice, you don’t need to rinse long-grain white rice for this recipe. The starch helps thicken the sauce and makes the dish creamier. If you rinse it, you’ll end up with dry, separate grains.
Use the Right Liquid Ratio — The general rule is 1 cup rice to 2 cups liquid. But because the tomato sauce also contains water, I stick to 2 cups broth + 1 can sauce for 1 cup rice. This ratio is perfect for this High Protein Ground Beef and Rice Skillet.
Low and Slow for Rice — Do not rush the simmering step. If the heat is too high, the rice will burn on the bottom before it cooks through. Keep it on low heat with the lid on.
Resting is Non-Negotiable — I know you want to eat it now. But let it rest for 5 minutes. It makes a huge difference in texture. The rice will be fluffier and less gummy.
Drain the Grease Wisely — If your beef is very fatty, drain most of it. But leave a tablespoon. That fat carries flavor and helps cook the rice.
Common Mistakes (and how to avoid them):
- Mistake: Rice is crunchy — Fix: It needs more time. Add ¼ cup broth and cook for 5 more minutes.
- Mistake: Rice is mushy — Fix: You used too much liquid or didn’t drain enough grease. Next time, reduce broth by ¼ cup.
- Mistake: Burnt bottom — Fix: Heat was too high. Always simmer on low with the lid on.
Variations & Substitutions
Once you’ve nailed the basic version, here’s how you can mix it up. I’ve tried all of these.
Taco Style — Swap Italian seasoning for taco seasoning. Add 1 cup black beans and corn. Top with shredded cheese, sour cream, and salsa. This is a crowd-pleaser.
Mexican Rice Skillet — Use cilantro-lime rice seasoning. Add diced tomatoes, green chiles, and black beans. Top with avocado and cilantro.
Lighter Version — Use 93/7 lean ground beef and reduce the cheese. Use vegetable broth instead of chicken broth. It’s still flavorful but lighter.
Gluten-Free — This recipe is naturally gluten-free if you use certified gluten-free broth and spices. Check your Worcestershire sauce label, as some brands contain barley.
Dairy-Free — Skip the cheese or use a dairy-free alternative. The dish is still delicious without it.
Vegan Version — Swap ground beef for plant-based ground or lentils. Use vegetable broth and skip the cheese. Add extra spices to compensate for the lack of beef flavor.
Serving & Storage
How to Serve:
I usually serve this straight from the skillet at the dinner table—it looks rustic and stays warm. But here are other ways I’ve enjoyed it:
- Side Dishes: Simple green salad with balsamic vinaigrette, roasted broccoli, or garlic bread.
- Toppings Bar: When I have guests, I put out: extra cheese, sour cream, salsa, cilantro, and hot sauce.
Storage Instructions:
Refrigerator: Store in an airtight container for up to 4 days. The rice will absorb more liquid in the fridge, so it might look dry. It’s normal.
Reheating: Best method: Add a splash of broth or water to a skillet, add your leftover rice, and heat gently over low heat, stirring frequently. The extra liquid brings back the creamy texture. Microwave sort of works but tends to dry it out. If you do microwave, definitely add a splash of water first and heat in short bursts, stirring between.
Freezing: Honestly, this doesn’t freeze well because of the rice texture. The rice can become grainy when thawed. Make it fresh or store in the fridge for up to 4 days.
Nutrition Information
I’m not a nutritionist, but here’s the breakdown if you’re tracking. Per serving (based on 6 servings):
– Calories: 380
– Protein: 22g
– Carbs: 45g
– Fiber: 2g
– Sugar: 4g
– Fat: 12g
– Saturated Fat: 5g
– Cholesterol: 65mg
– Sodium: 650mg
What’s Good: High protein, decent carbs for energy, and filling.
What to Know: Higher in sodium if you use regular broth. Use low-sodium broth to reduce. Contains gluten if you use regular Worcestershire sauce.
Look, this is comfort food. It’s not a diet recipe. But it’s way better than takeout, costs less, and I know exactly what’s in it. When I want to make it lighter, I use leaner beef and load up on vegetables. But usually? I just eat a reasonable portion and enjoy it.
Final Thoughts
So that’s my go-to High Protein Ground Beef and Rice Skillet! I’ve probably talked your ear off at this point, but when you make a recipe this often, you have a lot to say about it.
This has saved weeknight dinners more times than I can count. It’s my answer to “what’s for dinner” when I’m tired, don’t want takeout, and still want something that tastes really good. My kids are happy, my husband’s happy, and I’m happy because I’m not stressed about cooking.
Make it yours! Try different add-ins, swap in your favorite vegetables, adjust the spices. The best recipes are the ones you adapt to your family’s tastes.
If you make this, drop a comment and let me know what you think! I love hearing how recipes turn out in your kitchen. And if something doesn’t work, tell me that too—I’m here to help troubleshoot.
Happy cooking! And I hope your kitchen smells half as good as mine does right now.
Frequently Asked Questions
Can I use brown rice instead of white rice?
You can, but you’ll need more liquid and more time. Brown rice takes about 45 minutes to cook, and it absorbs more liquid. I’d recommend using 2.5 cups broth and cooking for 40-45 minutes. The texture will be chewier, but it still works.
My rice came out mushy—what happened?
Usually means you used too much liquid or didn’t drain enough grease from the beef. Next time, reduce the broth by ¼ cup. Also, make sure you’re not lifting the lid too often during the simmering step.
Can I make this ahead for a dinner party?
Sort of. You can prep all the ingredients ahead of time. When guests arrive, just brown the beef, add the liquids, and simmer. It’s fast enough to cook while people are chatting. I do this all the time.
Why did my rice burn on the bottom?
The heat was too high. Always simmer on low heat with the lid on. If you see smoke, turn off the heat immediately. Add a splash of water and let it sit for 10 minutes to loosen the burnt bits.
Can I use ground turkey instead of beef?
Yes! Use 93/7 lean ground turkey. It’s lighter and still high protein. You might need to add a little extra broth, as turkey is leaner than beef.
How do I reheat leftovers without it getting dry?
Add a splash of water or broth to a skillet, add your leftover rice, and heat gently over low heat, stirring frequently. The extra liquid brings back the creamy texture. Microwave sort of works but tends to dry it out.
Can I double this recipe?
Absolutely! Double everything and use your biggest skillet or a Dutch oven. The cooking times stay the same. Just make sure your lid fits tightly so the steam doesn’t escape.
Pin This Recipe!
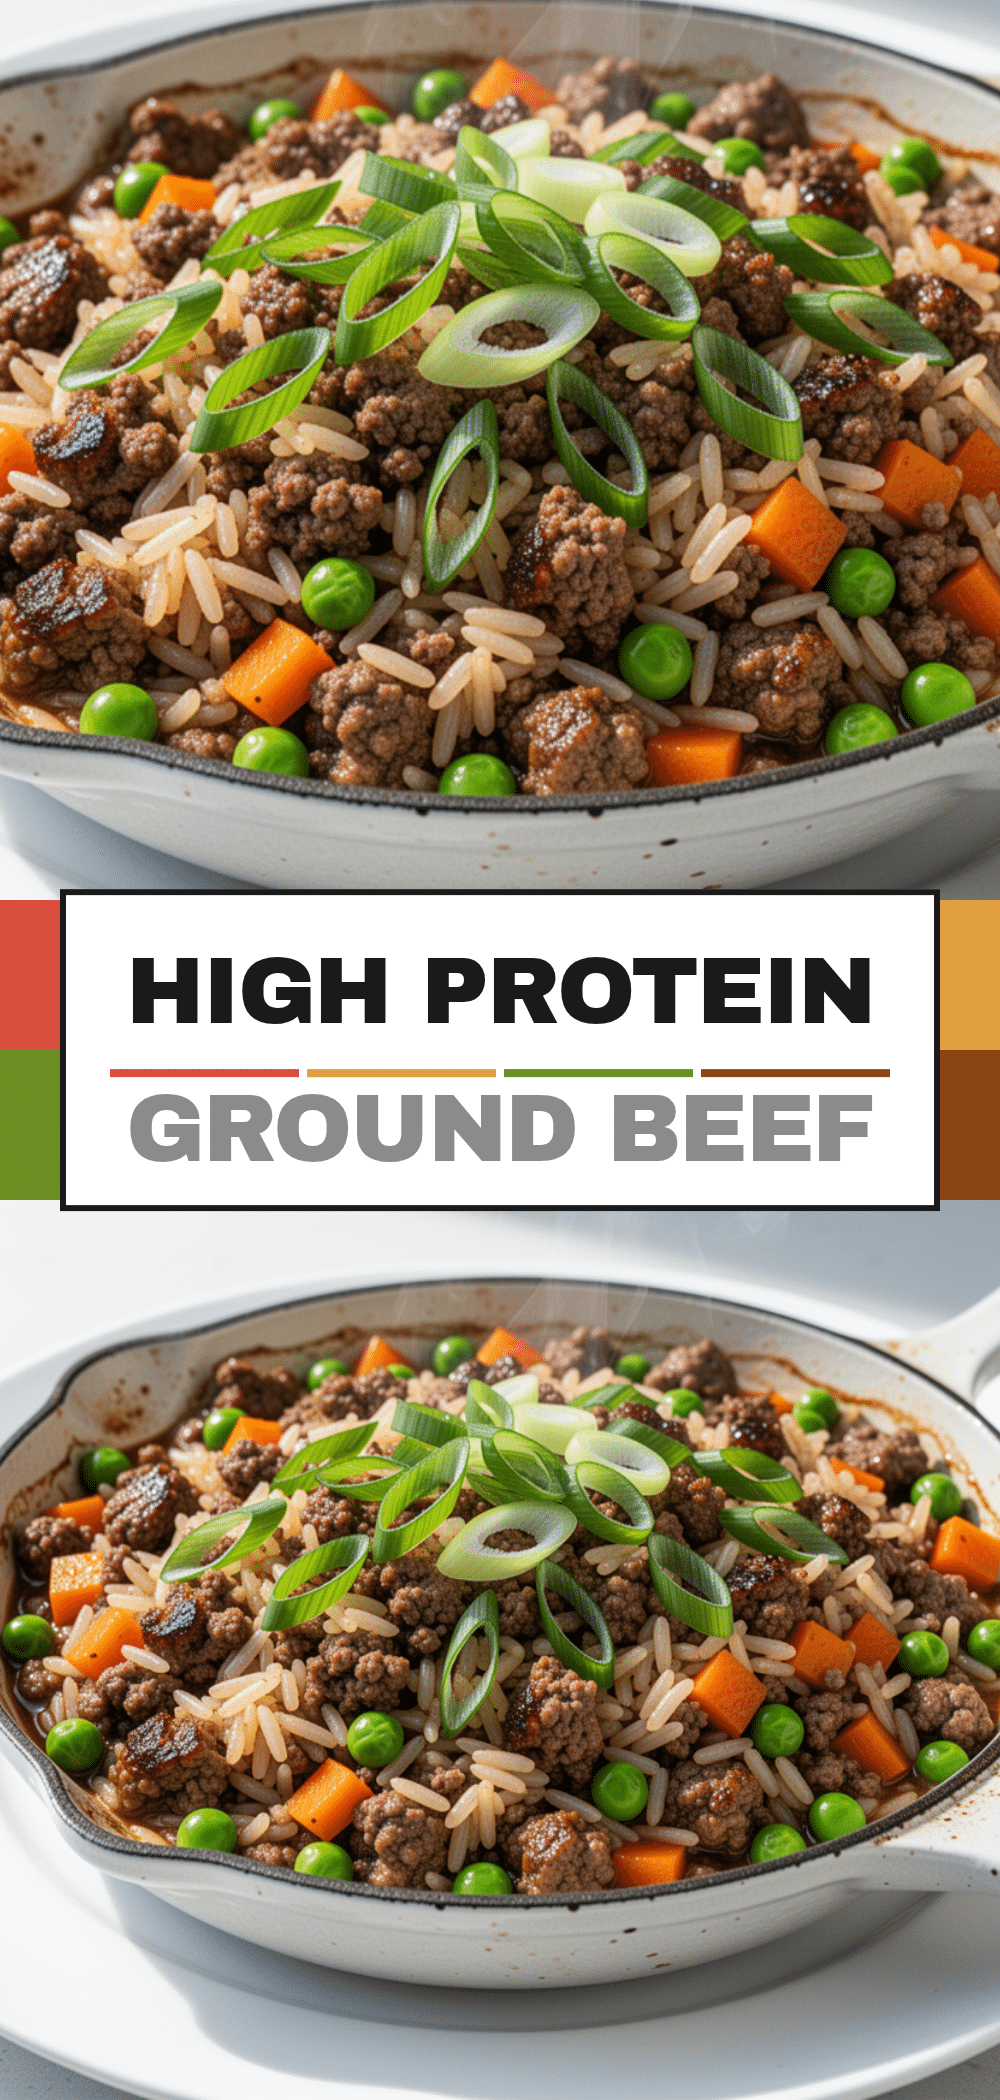
High Protein Ground Beef and Rice Skillet
- Total Time: 35 minutes
- Yield: 6 servings 1x
Description
A quick, one-pan weeknight dinner featuring tender ground beef and fluffy white rice simmered in a savory tomato and broth sauce. It’s budget-friendly, high in protein, and ready in about 35 minutes.
Ingredients
- 1.5 pounds ground beef (80/20 lean-to-fat ratio)
- 1 cup long-grain white rice
- 2 cups chicken broth (low-sodium)
- 1 medium yellow onion, diced
- 4 cloves garlic, minced
- 1 can (15 oz) tomato sauce or crushed tomatoes
- 1 tablespoon Worcestershire sauce
- 2 teaspoons Italian seasoning
- 1 teaspoon smoked paprika
- 1 teaspoon salt (or to taste)
- 1/2 teaspoon black pepper (or to taste)
- Optional: 1 medium bell pepper, diced
- Optional: 1 can (15 oz) black beans, drained
- Optional: 1 cup shredded cheddar cheese
- Optional: 1/4 cup fresh cilantro, chopped
Instructions
- Prep ingredients: Dice the onion, mince the garlic, and measure out the spices.
- Brown the beef: Heat a large skillet over medium-high heat. Add ground beef and break it up with a wooden spoon. Cook for 6-8 minutes until browned and no pink remains. Drain excess grease if necessary, but leave about 1 tablespoon for flavor.
- Sauté aromatics: Add the diced onion to the skillet with the beef. Cook for 2-3 minutes until softened. Add the minced garlic and cook for 1 more minute, stirring constantly.
- Add liquids and rice: Pour in the chicken broth, tomato sauce, Worcestershire sauce, and uncooked rice. Stir to combine, ensuring rice is submerged. Add Italian seasoning and smoked paprika.
- Simmer: Bring the mixture to a boil, then reduce heat to low. Cover with a tight-fitting lid and simmer gently for 15-18 minutes without lifting the lid.
- Check and adjust: After 15 minutes, check if rice is tender and liquid is absorbed. If crunchy, add 1/4 cup more broth and cook for 5 more minutes.
- Rest: Remove skillet from heat. Keep lid on and let rest for 5 minutes to allow rice to finish absorbing liquid and become fluffy.
- Fluff and serve: Uncover and fluff rice with a fork. Top with cheese (if using) and let melt for 1 minute. Garnish with fresh cilantro and serve immediately.
Notes
Do not rinse the rice; the starch helps thicken the sauce. Use low-sodium broth to control salt levels. If using brown rice, increase liquid to 2.5 cups broth and cook for 40-45 minutes. This recipe does not freeze well due to rice texture changes.
- Prep Time: 10 minutes
- Cook Time: 25 minutes
- Category: Main Course
- Cuisine: American
Nutrition
- Serving Size: 1/6 of the skillet
- Calories: 380
- Sugar: 4
- Sodium: 650
- Fat: 12
- Saturated Fat: 5
- Carbohydrates: 45
- Fiber: 2
- Protein: 22
Keywords: ground beef, rice skillet, one pan meal, high protein, weeknight dinner, budget friendly, comfort food, easy recipe


