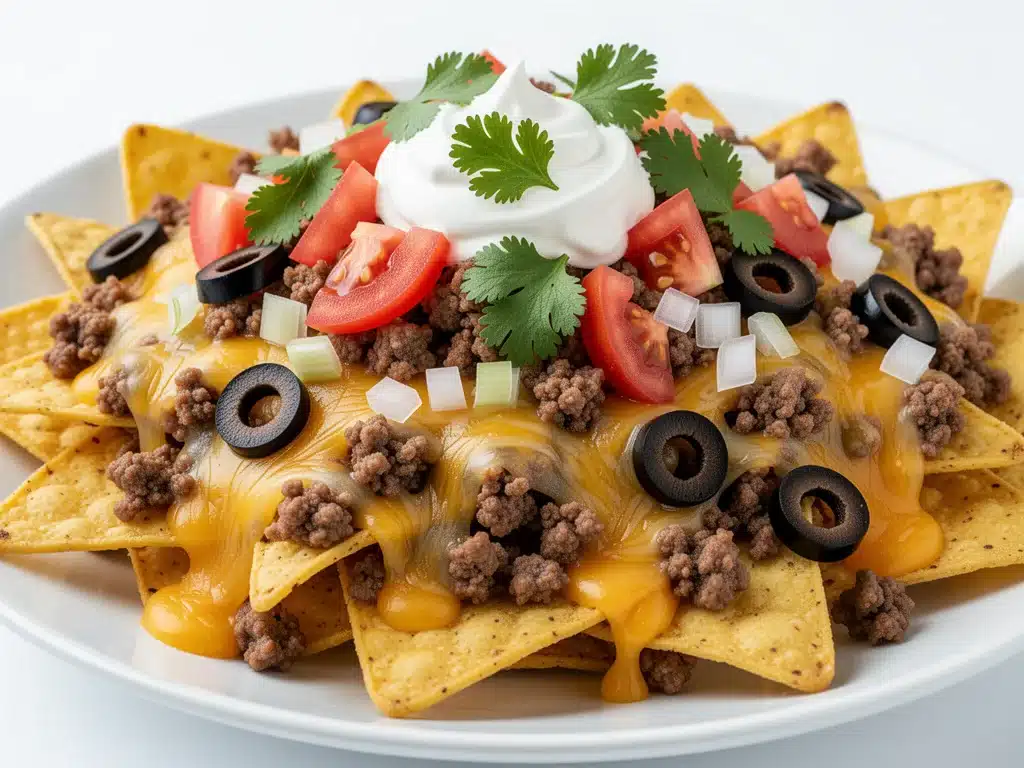
I still remember the night I learned that “just a little snack” is a lie. It was three years ago, at my brother’s wedding reception. The DJ was playing something upbeat, the lighting was dim, and I walked into the back room to grab a single plate of appetizers. I saw a tray of nachos. Just a small, sad-looking tray with maybe ten chips on it. I thought, Perfect. One plate. That’s it.
Fast forward twenty minutes. I’m standing in a corner, holding a paper plate that is basically a structural hazard, loaded with melted cheese, dripping salsa, and ground beef. My friends are asking, “Where did you find those?” And then I realized: they were gone. All of them. The tray was empty. I had accidentally started a food fight over cheese sauce. That night, I made a promise to myself: I would never again show up to a party with a sad, underwhelming snack. I needed a nacho recipe that could handle a crowd, survive the heat, and taste so good people would forgive you for being late to the party.
That promise led to months of testing. I’ve burned cheese, I’ve made beef that was too dry, I’ve tried using store-bought queso that tasted like plastic, and I’ve even attempted to bake a whole sheet pan of chips at 450 degrees (spoiler: they turned into dust). But after about fifteen iterations, I finally nailed it. This Loaded Cheesy Ground Beef Nachos recipe is the one I make for every Super Bowl, every tailgate, every last-minute gathering where I have no idea who’s coming. It’s hearty enough to be a meal, but fun enough to be a snack. It’s cheesy, it’s spicy, and it’s stupidly easy to throw together.
Here’s the thing about party food: it needs to be forgiving. You can’t be hovering over the stove while people are walking in with wine. This recipe lets you prep the beef ahead of time, so the only thing you’re doing right before serving is melting cheese and throwing it in the oven. It’s the kind of dish that disappears in minutes, leaving everyone asking for more. And honestly? That’s the highest compliment a cook can get.
Why You’ll Love This Nacho Recipe
There are a lot of nacho recipes out there. Some are too greasy, some are too bland, and some require you to buy five different types of cheese and a mortar and pestle. This one is different. It’s practical. It’s delicious. And it works every single time. Here’s why this Loaded Cheesy Ground Beef Nachos recipe has become my go-to for any occasion:
- It Feeds a Crowd (Without Breaking the Bank) — Seriously, you can feed 8-10 people for under $25. I’ve done the math. It’s cheaper than ordering pizza, and way more impressive. I made this for a game day party last month, and my cousin said, “Did you cater this?” No, Kevin. I just bought ground beef and cheese.
- Zero Stress Cooking — The beef is cooked in one pan. The chips are just chips. The cheese melts. That’s it. I’ve made this while helping my kids with their homework, and while video-calling my mom. It doesn’t require precision timing. If you burn the cheese slightly, it’s just “crispy.” If it’s under-melted, just put it back in for two minutes. There is no failure mode here.
- Customizable for Everyone — My vegetarian sister hates beef. My brother is obsessed with jalapeños. My niece just wants cheese. This recipe accommodates all of it. You can build a “build-your-own nacho bar” easily, or just make one big tray and let people dig in. I love that I can toss in extra veggies or swap the meat without changing the core recipe.
- It Tastes Better the Second Day (Kind Of) — Okay, fresh nachos are best. But if you have leftovers (which is rare), they reheat surprisingly well in the oven. The flavors meld together overnight. I’ve had leftover nachos for breakfast, and I don’t regret a thing.
- Visual Drama — There is something deeply satisfying about pulling a tray out of the oven where the cheese is bubbling and golden. It looks like you put in way more effort than you did. It’s the ultimate “look at my cooking” flex, even though it took 20 minutes of active time.
This is my answer to “what should I bring?” when I’m invited somewhere, or “what should I make?” when I’m hosting. It’s reliable, it’s tasty, and it makes people happy. And in my book, that’s everything.
Ingredients You’ll Need for Loaded Cheesy Ground Beef Nachos
Before we get to the cooking, let’s talk about what’s in the cart. I’m not going to lie—this looks like a long list, but a lot of it is pantry staples or freezer items. I’m particular about three things here: the quality of the beef, the type of cheese, and the heat level. Get those right, and you’re golden.
For the Beef Topping
Ground beef (1.5 pounds / 680g) — I use 80/20 fat ratio. Lean beef (90/10 or 93/7) just doesn’t have enough flavor or moisture for nachos. You want that rich, beefy taste. If you can’t find 80/20, mix some ground turkey in, but the fat is key for flavor. Brown it well—don’t rush this step.
Yellow onion (1 medium, finely diced / about 150g) — This adds sweetness and depth. If you’re sensitive to raw onion bite, cook it down with the beef until it’s soft and translucent. I like to dice it small so it distributes evenly on every chip.
Garlic (4 cloves, minced / about 2 tablespoons) — Fresh garlic only. No jarred stuff here. The raw bite cooks out, leaving a sweet, aromatic base. If you’re a garlic lover (like me), go for 6 cloves. You won’t regret it.
Taco seasoning (1 packet / 28g, or homemade) — I usually use a store-bought packet like Old El Paso or McCormick for convenience. But if you have time, a homemade mix of cumin, chili powder, paprika, garlic powder, onion powder, salt, and pepper is way better. No salt in the packet? You might need to add extra salt to the beef.
Water (½ cup / 120ml) — This helps the seasoning dissolve and coat the beef evenly. It reduces down to a thick, flavorful sauce.
Black beans (1 can / 15oz, drained and rinsed) — Optional, but I always add them. They add protein, texture, and bulk without adding too many calories. Drain them well, or your nachos will be watery.
Corn (½ cup / 75g, frozen or canned) — Sweet corn adds a nice crunch and color contrast. Frozen corn works great—just thaw it and add it in. Canned corn is fine, but drain it thoroughly.
For the Cheese Layer
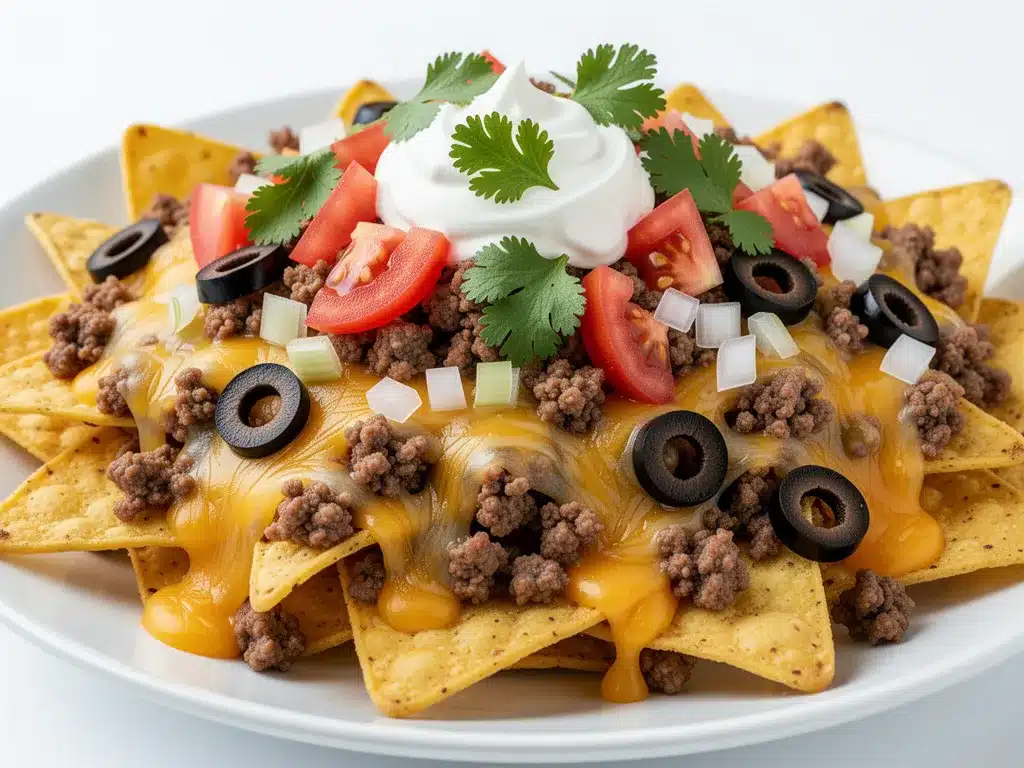
Cheddar cheese (2 cups / 200g, shredded) — Sharp cheddar is non-negotiable. Mild cheddar is too bland for this. Buy a block and shred it yourself. Pre-shredded cheese has anti-caking agents that prevent it from melting smoothly. I’ve tried it both ways, and the block-shredded version makes a silky, gooey sauce that clings to the chips.
Monterey Jack cheese (1.5 cups / 150g, shredded) — This is your melting cheese. It has a mild flavor and melts beautifully. It balances the sharpness of the cheddar. If you can’t find Monterey Jack, use mozzarella, but it’ll be less flavorful.
Queso Fresco or Cotija (½ cup / 50g, crumbled) — This is the finishing touch. These cheeses don’t melt; they stay crumbly and salty. Sprinkle them on *after* baking. It adds a nice textural contrast to the gooey cheese.
For the Toppings
Jalapeños (½ cup / 75g, sliced) — Fresh or pickled. I like fresh for a sharper heat, but pickled adds a tangy crunch. If you’re sensitive to spice, remove the seeds and ribs. If you’re a heat-seeker, keep them all in.
Green onions (4 stalks, thinly sliced / about ½ cup) — Adds a fresh, oniony bite that cuts through the richness. Use the white parts for cooking and the green parts for garnish.
Black olives (½ cup / 75g, sliced) — Optional, but classic. I like the briny flavor. If you hate olives, skip them. No judgment.
Salsa (1 cup / 240g) — Use a medium or thick salsa. Watery salsa will make your chips soggy. I prefer a restaurant-style salsa or a chunky pico de gallo. You can also use a spoonful of sour cream or guacamole on top.
Cilantro (½ cup / 15g, chopped) — Fresh cilantro adds brightness. If your family hates cilantro (thanks to the soap gene), skip it or use parsley.
For the Base
Tortilla chips (2-3 bags / 12-16oz total) — Use sturdy, restaurant-style chips. Thin chips will break under the weight of the beef and cheese. I like Fritos or generic brand “restaurant style” chips. Avoid kettle chips—they’re too thick and don’t hold sauce well.
Equipment Needed
You don’t need fancy gadgets for this. Here’s what I actually use:
Large skillet or cast iron pan — I use a 12-inch skillet. It needs to be big enough to cook the beef and onions without steaming them. Cast iron is great for retaining heat, but stainless steel works too.
Sheet pan (18×13 inch) — A large rimmed baking sheet is essential. I use a half-sheet pan. If you don’t have one, two smaller pans work, but you’ll have to split the recipe. Don’t use a small pan—the chips will pile up too high and won’t bake evenly.
Box grater — For shredding your own cheese. It takes about 5 minutes, but it’s worth it for the melt quality.
Cutting board and knife — For chopping onions, jalapeños, and green onions. Sharp knife helps—dull knives are frustrating.
Colander — For draining beans and corn. Press them dry with a paper towel if you’re worried about moisture.
How to Make It: Step-by-Step
Alright, let’s make this! I’m walking you through exactly how I do it, including the little tricks I’ve picked up over the years.
Step 1: Prep Your Ingredients (10 minutes)
Before you start cooking, chop your onion, mince your garlic, slice your jalapeños, and shred your cheese. I know it seems fussy, but it makes the actual cooking way less stressful. Once you start browning the beef, things move fast. Set out your sheet pan and line it with parchment paper for easier cleanup. Trust me on this.
Step 2: Cook the Beef (10 minutes)
Heat your large skillet over medium-high heat. Add the ground beef, breaking it up with a wooden spoon as it cooks. Cook for 5-6 minutes until browned and no longer pink. Drain any excess fat if there’s too much (but leave a little for flavor). Add the diced onion and cook for 2 minutes until soft. Add the garlic and cook for 30 seconds until fragrant. Stir in the taco seasoning and water. Let it simmer for 2-3 minutes until the liquid reduces and coats the beef. Stir in the drained black beans and corn. Remove from heat and set aside.
Step 3: Build the Base (2 minutes)
Spread a single layer of tortilla chips on your prepared sheet pan. Don’t pile them up yet—you want them flat so they bake evenly. If you have a huge crowd, use two pans. Sprinkle half of the shredded cheddar and Monterey Jack cheese over the chips.
Step 4: Add the Toppings (2 minutes)
Evenly distribute the beef mixture over the cheese. Then, sprinkle the remaining cheese on top. This double-cheese layer ensures every chip gets coated. Scatter the jalapeños, black olives, and green onions (white parts) over the top.
Step 5: Bake (5-7 minutes)
Preheat your oven to 400°F (200°C). Place the sheet pan in the oven and bake for 5-7 minutes. Watch it closely! You want the cheese to be fully melted and bubbling, with just a few golden spots. Do not walk away. Cheese goes from “perfect” to “burnt” very quickly. If your oven runs hot, check at 4 minutes.
Step 6: Finish and Serve (1 minute)
Remove from the oven. Immediately sprinkle the crumbled queso fresco or cotija on top. Add the green onion greens, fresh cilantro, and a dollop of sour cream if you’re using it. Serve immediately while hot and cheesy. If you’re serving salsa, put it in a bowl on the side to keep the chips crisp.
Total Time: About 25 minutes (10 minutes prep, 15 minutes cooking)
Expert Tips & Tricks
Here’s everything I’ve learned from making this dozens of times. These tips will save you from my mistakes.
- Don’t Skip the Parchment Paper — Cheese sticks. It sticks to everything. Parchment paper makes cleanup a breeze. You can also use foil, but parchment is easier.
- Shred Your Own Cheese — I can’t stress this enough. Pre-shredded cheese has cellulose in it, which prevents melting. Your nachos will look greasy and clumpy. Block cheese melts into a smooth, creamy layer. It’s worth the 5 minutes.
- Don’t Overcrowd the Pan — If you pile the chips too high, the bottom layer won’t get hot enough to crisp up. You’ll end up with soggy chips. Single layer is best. If you’re feeding more people, use two pans.
- Drain Your Beans and Corn — Wet ingredients make soggy nachos. Drain the beans and corn thoroughly. If you’re using canned corn, press it dry with a paper towel. Same for salsa—use a thick salsa, not a watery one.
- Add Fresh Toppings After Baking — Don’t put the cilantro, green onions, or jalapeños in the oven. They’ll wilt and lose their fresh crunch. Add them right after you take the pan out of the oven.
- Keep the Oven Door Closed — Once the cheese is melting, don’t open the oven door. The temperature drop can cause the cheese to seize up or not melt evenly. Trust the process.
- For Extra Crispiness — Broil for the last 1-2 minutes. But watch it like a hawk! It goes from golden to black in seconds. I usually just bake at 400°F, but if you like crispy edges, broil carefully.
- Make Ahead Strategy — You can cook the beef mixture up to 2 days ahead and store it in the fridge. When you’re ready to serve, just assemble and bake. This saves time during parties.
- Common Mistake: Soggy Nachos — Fix: Use sturdy chips, drain all wet ingredients, and don’t add salsa until serving. Salsa on top of hot cheese makes chips soggy fast. Serve salsa on the side.
- Common Mistake: Burnt Cheese — Fix: Lower the oven temperature to 375°F if you’re worried about burning. It’ll take 2-3 minutes longer, but the cheese will melt evenly without scorching.
- Turkey Nachos — Swap ground beef for ground turkey. Add extra cumin and smoked paprika for flavor. It’s leaner but still tasty.
- Chicken Nachos — Use shredded rotisserie chicken or grilled chicken breast. Toss it with taco seasoning. Great for using up leftovers.
- Veggie Nachos — Skip the meat. Add extra black beans, corn, bell peppers, and mushrooms. Sauté the veggies first to remove moisture. Top with extra cheese.
- Breakfast Nachos — Add scrambled eggs, breakfast sausage, and hash browns. Top with cheese and salsa. Perfect for brunch.
- Seafood Nachos — Use cooked shrimp or crab meat. Add a lime-cream sauce instead of cheese. Top with cilantro and avocado. Fancy, but delicious.
- Spicy Version — Add diced habaneros or serrano peppers to the beef. Use pepper jack cheese instead of Monterey Jack. Serve with hot sauce on the side.
- Gluten-Free — Use certified gluten-free tortilla chips. Everything else is naturally gluten-free. Check your taco seasoning label to be sure.
- Dairy-Free — Use dairy-free cheese shreds (like Violife or Daiya). They melt differently, but work in a pinch. Skip the queso fresco or use a dairy-free alternative.
- Low-Carb — Use pork rinds or low-carb chips instead of tortilla chips. Top with beef, cheese, and veggies. It’s not traditional, but it works.
Variations & Substitutions
Once you’ve nailed the basic version, here’s how you can mix it up. I’ve tried all of these.
Serving & Storage
How to Serve
I usually serve these straight from the sheet pan at the dinner table—it looks rustic and stays warm. But here are other ways I’ve enjoyed it:
Side Dishes: A simple green salad with lime vinaigrette, roasted sweet potatoes, or a bowl of chili. These nachos are filling enough to be a meal, so you don’t need much else.
Toppings Bar: When I have guests, I put out small bowls of sour cream, guacamole, extra salsa, hot sauce, and fresh cilantro. Everyone customizes their bite.
Wine Pairing: Not a wine expert, but a crisp Sauvignon Blanc or a light red like Pinot Noir works well. Beer is also great—lager or IPA.
Storage Instructions
Refrigerator: Store leftovers in an airtight container for up to 3 days. The chips will soften, but the flavors are still good.
Reheating: Best method: Preheat oven to 350°F. Spread nachos on a sheet pan and bake for 10-15 minutes until cheese is melted and chips are crisp again. Microwave: Heat in 30-second intervals, but the chips will get chewy. Not recommended.
Freezing: I don’t recommend freezing nachos. The chips get soggy and the cheese separates. Make them fresh.
Meal Prep: Cook the beef mixture ahead of time. Store in the fridge. When ready to serve, assemble and bake. This saves time during parties.
Nutrition Information
I’m not a nutritionist, but here’s the breakdown if you’re tracking. Keep in mind, this is a rich, indulgent dish, so portions matter.
Per Serving (based on 8 servings):
| Nutrient | Amount |
|---|---|
| Calories | 450 |
| Protein | 22g |
| Carbs | 35g |
| Fat | 25g |
| Fiber | 4g |
| Sodium | 680mg |
What’s Good: Decent protein from beef and cheese. Calcium from the cheese. Fiber from beans and veggies.
What to Know: Higher in calories and sodium due to cheese, beef, and seasoning. Contains dairy and gluten. Can be made gluten-free or vegetarian.
My Take: Look, this is comfort food. It’s not a diet recipe. But it’s way better than takeout, costs less, and I know exactly what’s in it. When I want to make it lighter, I use less cheese, more veggies, and turkey instead of beef. But usually? I just eat a reasonable portion and enjoy it.
Final Thoughts
So that’s my Loaded Cheesy Ground Beef Nachos recipe! I’ve probably talked your ear off at this point, but when you make a recipe this often, you have a lot to say about it. This has saved me more times than I can count. It’s my answer to “what’s for dinner?” when I’m tired, don’t want takeout, and still want something that tastes really good. My kids are happy, my husband’s happy, and I’m happy because I’m not stressed about cooking.
Make it yours! Try different add-ins, swap in your favorite vegetables, adjust the heat. The best recipes are the ones you adapt to your family’s tastes. If you make this, drop a comment and let me know what you think! I love hearing how recipes turn out in your kitchen. And if something doesn’t work, tell me that too—I’m here to help troubleshoot.
Happy cooking! And I hope your kitchen smells half as good as mine does right now.
Frequently Asked Questions
Can I use leftover beef instead of ground beef?
Absolutely! If you have leftover roast beef or steak, chop it up and toss it with taco seasoning. It’ll work great. Just make sure it’s heated through when you add it to the nachos.
Why did my nachos turn out soggy?
Usually, this happens because of too much moisture. Make sure you drain the beans and corn thoroughly. Also, don’t add salsa until serving time. Salsa on hot cheese makes chips soggy fast. Use a thick salsa or pico de gallo if you add it.
Can I make these ahead of time?
You can prep the beef mixture ahead of time. Store it in the fridge for up to 2 days. When you’re ready to serve, assemble the nachos and bake them. Don’t assemble them fully ahead of time—the chips will get soggy.
Can I freeze these nachos?
I don’t recommend it. The chips will get mushy when thawed, and the cheese will separate. It’s best to make them fresh. If you have leftovers, store them in the fridge and reheat in the oven.
Can I use cheese from a bag?
You can, but it won’t melt as well. Pre-shredded cheese has anti-caking agents that prevent smooth melting. Your nachos will look greasy and clumpy. Block cheese melts into a silky, creamy layer. It’s worth the extra 5 minutes to shred it yourself.
How do I reheat leftovers?
Best method: Preheat oven to 350°F. Spread nachos on a sheet pan and bake for 10-15 minutes until cheese is melted and chips are crisp again. Microwave: Heat in 30-second intervals, but the chips will get chewy. Not recommended.
Can I make these gluten-free?
Yes! Just use certified gluten-free tortilla chips. Everything else is naturally gluten-free. Check your taco seasoning label to ensure it doesn’t contain wheat.
Pin This Recipe!
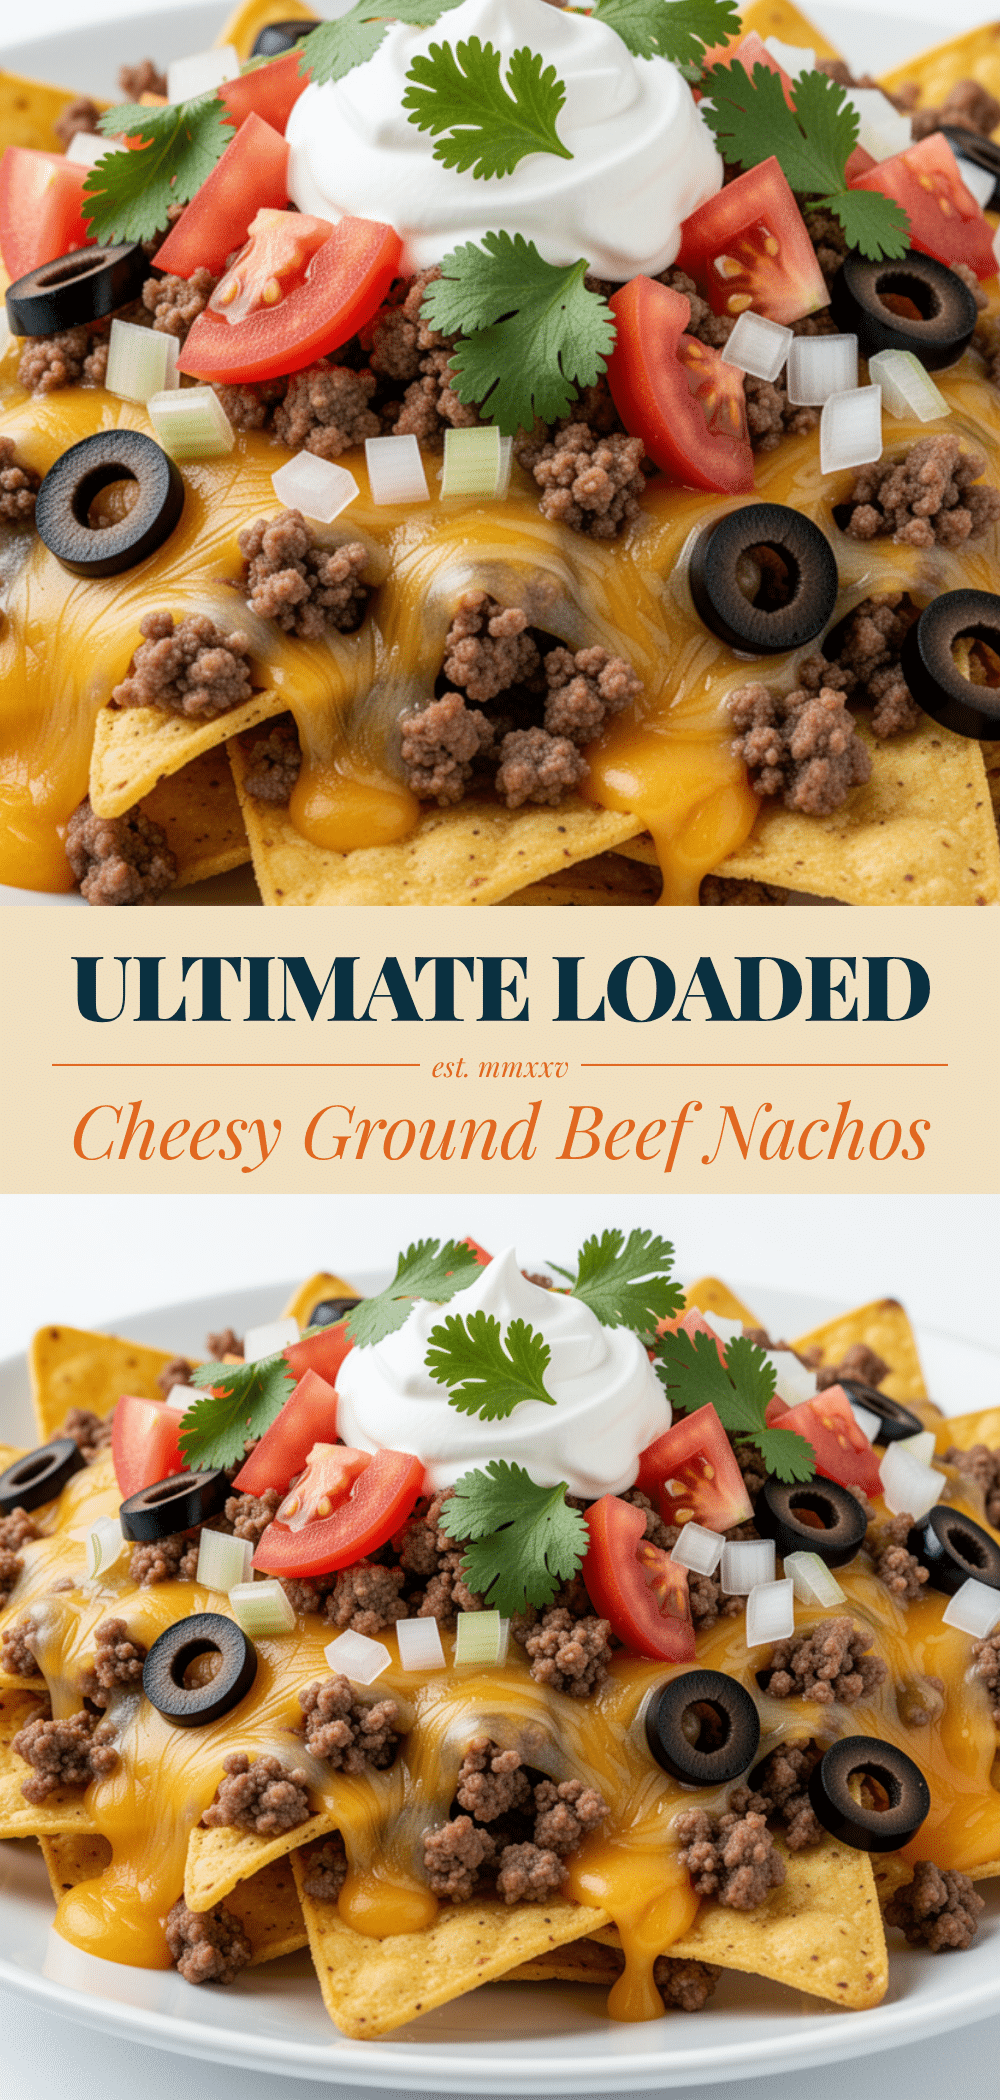
Loaded Cheesy Ground Beef Nachos: Best Party Snack
- Total Time: 25 minutes
- Yield: 8 servings 1x
Description
A crowd-pleasing, easy-to-make nacho recipe featuring seasoned ground beef, a double layer of melted cheddar and Monterey Jack cheese, and fresh toppings. Perfect for parties, game days, or a hearty meal.
Ingredients
- 1.5 pounds ground beef (80/20 fat ratio)
- 1 medium yellow onion, finely diced
- 4 cloves garlic, minced
- 1 packet taco seasoning (28g) or homemade mix
- 1/2 cup water
- 1 can (15oz) black beans, drained and rinsed
- 1/2 cup corn (frozen or canned)
- 2 cups sharp cheddar cheese, shredded
- 1.5 cups Monterey Jack cheese, shredded
- 1/2 cup queso fresco or cotija, crumbled
- 1/2 cup jalapeños, sliced
- 4 stalks green onions, thinly sliced
- 1/2 cup black olives, sliced
- 1 cup salsa (medium or thick)
- 1/2 cup cilantro, chopped
- 2–3 bags (12-16oz total) sturdy tortilla chips
Instructions
- Preheat oven to 400°F (200°C). Line a large rimmed baking sheet (18×13 inch) with parchment paper.
- In a large skillet over medium-high heat, brown the ground beef, breaking it up with a wooden spoon. Cook for 5-6 minutes until no longer pink. Drain excess fat if necessary.
- Add the diced onion to the beef and cook for 2 minutes until soft. Add garlic and cook for 30 seconds until fragrant.
- Stir in taco seasoning and water. Simmer for 2-3 minutes until liquid reduces and coats the beef.
- Stir in drained black beans and corn. Remove from heat and set aside.
- Spread a single layer of tortilla chips on the prepared sheet pan. Sprinkle half of the shredded cheddar and Monterey Jack cheese over the chips.
- Evenly distribute the beef mixture over the cheese. Sprinkle the remaining cheese on top.
- Scatter jalapeños, black olives, and the white parts of the green onions over the top.
- Bake for 5-7 minutes until cheese is fully melted and bubbling with golden spots.
- Remove from oven. Immediately sprinkle crumbled queso fresco or cotija on top.
- Garnish with green onion greens, fresh cilantro, and serve with salsa on the side.
Notes
Shred your own cheese for better melting; pre-shredded cheese contains anti-caking agents. Drain beans and corn thoroughly to prevent soggy nachos. Add fresh toppings like cilantro and green onions after baking to maintain crunch. Serve salsa on the side to keep chips crisp.
- Prep Time: 10 minutes
- Cook Time: 15 minutes
- Category: Appetizer
- Cuisine: Mexican
Nutrition
- Serving Size: 1 serving (approx. 1
- Calories: 450
- Sugar: 3
- Sodium: 680
- Fat: 25
- Saturated Fat: 12
- Carbohydrates: 35
- Fiber: 4
- Protein: 22
Keywords: nachos, ground beef, cheese, party snack, super bowl, easy dinner, mexican food, crowd pleaser


