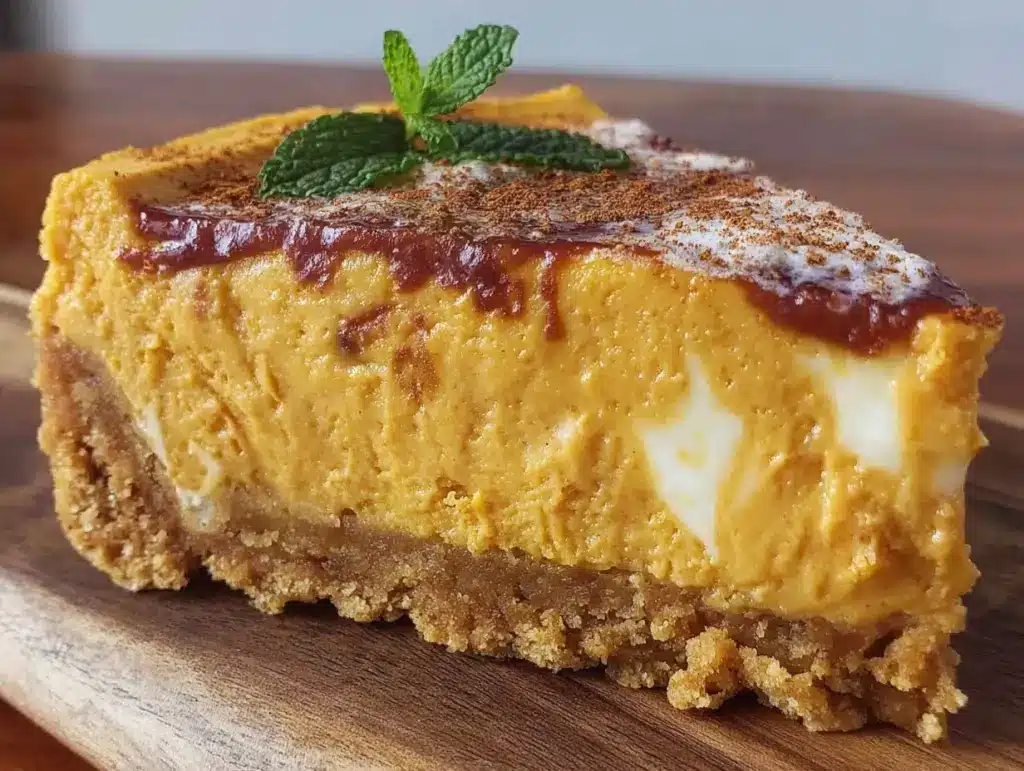
Last October, I was staring at a half-empty propane tank and a grill that had seen better days. I had just finished smoking a brisket that came out perfect—tender, smoky, with that deep mahogany bark I’ve been chasing for years. But then came the inevitable question: “What’s for dessert?” The usual suspects were off the table. It was too warm for a heavy baked pie, and the kitchen was already a disaster zone from the main course. I didn’t want to fire up the oven, cook another batch of pumpkin spice cake, or deal with a messy indoor kitchen while my guests were still hanging out by the fire pit.
So, I did what I always do when I’m stuck: I improvised. I grabbed a package of gingersnap cookies, some cream cheese, canned pumpkin, and a jar of pumpkin pie spice. I thought, “What’s the worst that could happen? It’s just cheese and cookies.” I threw the crust together in the food processor, mixed the filling, and let it chill in the cooler next to the drinks. But here’s the thing—I wanted to add that signature outdoor flavor. I decided to lightly toast the gingersnap crumbs over the residual heat of the grill grates, just to wake up those spices. It was a gamble. Would they burn? Would it taste like ash?
It was perfect. The crust had a subtle smokiness that complemented the sweet, spiced filling in a way I hadn’t expected. That night, my friends didn’t just eat dessert; they lingered. They asked how I managed to make a cheesecake without an oven. I smiled and told them the secret wasn’t just the recipe—it was the method. This no-bake pumpkin pie cheesecake has become my go-to for fall gatherings, tailgates, and those crisp evenings when you want something cozy but don’t want to be stuck indoors. It’s creamy, it’s spiced, and it’s made with the simplest tool: a cooler or just the fridge, with a little help from the grill for the crust.
I’ve made this dessert over a dozen times since that night. I’ve tweaked the ratio of pumpkin to cream cheese, experimented with different cookie crumbs, and even tried smoking the cheesecake itself (spoiler: don’t do that, it gets weird). But the version I’m sharing today? It’s the one that works every single time. It’s easy, it’s forgiving, and it tastes like autumn wrapped in a blanket. If you’ve ever been intimidated by no-bake desserts, trust me, this is the one to start with.
Why You’ll Love This No-Bake Pumpkin Pie Cheesecake
Real talk: most no-bake cheesecakes are just sweet, dense blocks of cream cheese. This one is different. It captures the essence of a traditional pumpkin pie but with the rich, tangy depth of a cheesecake. Here’s why this recipe earns a permanent spot in my grilling rotation:
- Zero Oven Drama — I love my oven, but in October, I don’t want to heat up the house when I’m trying to enjoy the cool air outside. This no-bake pumpkin pie cheesecake requires no baking at all. You mix, you chill, you eat. It’s that simple.
- Smoky Gingersnap Crust — This is the game-changer. By lightly toasting the gingersnap crumbs on the warm grill grates, you infuse the crust with a subtle smoke flavor that pairs beautifully with the pumpkin. It adds a complexity that a standard graham cracker crust just can’t match.
- Make-Ahead Friendly — I’ve tested this recipe by making it the night before, and it actually tastes better after sitting for 24 hours. The flavors meld, the texture firms up, and it becomes easier to slice. It’s perfect for meal prep or when you’re hosting a large group.
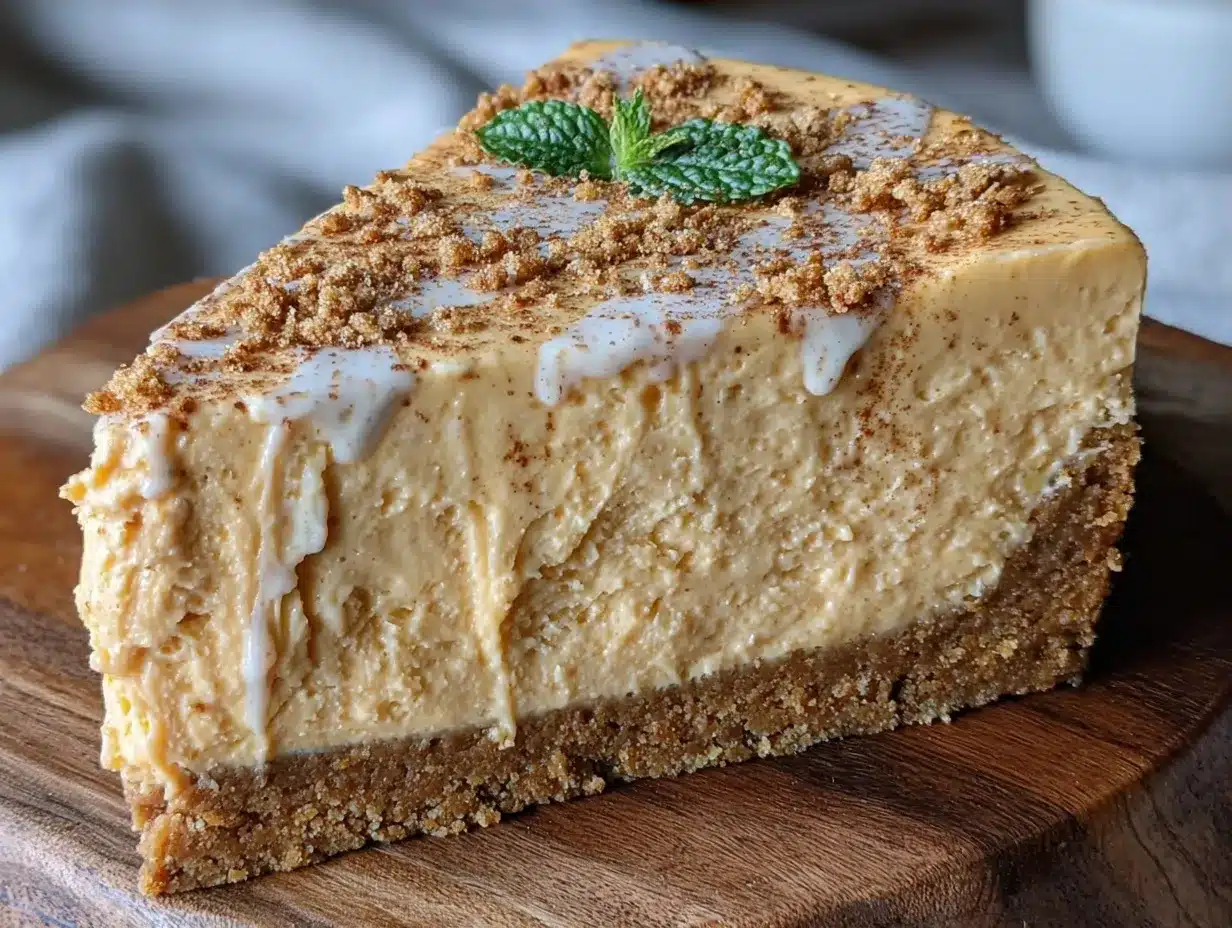
- Texture Contrast — The filling is incredibly smooth and creamy, almost like a mousse. But then you bite into that crust, and it’s crunchy, spicy, and slightly charred. That contrast keeps every bite interesting. It’s not just sweet; it’s savory-sweet, spicy, and smoky all at once.
- Gluten-Free Option — Not all my guests eat gluten, and this recipe is easily adaptable. Using gluten-free gingersnaps or a nut-based crust keeps everyone included. I’ve made this with almond flour for a keto-friendly version, and it still holds up.
- Visual Appeal — This cheesecake looks stunning, especially when served with a dollop of whipped cream and a sprinkle of pumpkin seeds. It’s Instagram-worthy, but more importantly, it’s delicious. My friends always ask for the recipe, and I’m happy to share.
This is my go-to when dinner needs to just work, but I still want to impress. It’s elegant enough for a dinner party but casual enough for a backyard bonfire.
Key Ingredients for the Best No-Bake Pumpkin Pie Cheesecake
Let’s talk about what goes into this no-bake pumpkin pie cheesecake. You don’t need fancy ingredients, but you do need quality ones. Here’s what I use and why:
Full-Fat Cream Cheese
16 oz (450g), softened
This is the base of your cheesecake. Do not use low-fat or whipped cream cheese. Low-fat versions have too much water and air, which means your cheesecake will be runny and lack that rich, dense texture. I use Philadelphia block cream cheese. Let it sit out for at least 30 minutes before mixing. If it’s cold, you’ll get lumps, and no amount of beating will fix it. I’ve learned this the hard way—once, I rushed it, and the final product had tiny cheese chunks that ruined the smoothness.
Canned Pumpkin Puree
15 oz (425g) can, drained
Not pumpkin pie filling. I repeat: not pumpkin pie filling. Pie filling has sugar and spices already added, which will mess up your balance. You want 100% pure pumpkin puree. Pro tip: drain the puree in a cheesecloth or paper towels for 15 minutes. Canned pumpkin is watery, and that extra moisture can prevent your cheesecake from setting properly. I’ve skipped this step before, and the result was a soggy, unstable dessert. Do yourself a favor and drain it.
Gingersnap Cookies
2 cups (approx. 200g), crushed
These are the star of the crust. Gingersnaps have that spicy kick from ginger, cinnamon, and molasses, which pairs perfectly with pumpkin. I use standard store-bought gingersnaps because they’re consistent. If you can find them at a local bakery, even better. Crush them into fine crumbs. I use a food processor for speed, but a zip-top bag and a rolling pin work too. Just make sure the crumbs are fine; large chunks will make the crust crumbly and difficult to slice.
Unsalted Butter
4 tbsp (57g), melted
The butter binds the crust together. Don’t skip it, or you’ll have a pile of dry crumbs. Melt it gently in the microwave or a small saucepan. Let it cool slightly before mixing with the crumbs so you don’t melt the cookies prematurely.
Granulated Sugar
1/2 cup (100g)
Since the pumpkin is unsweetened, you need sugar to balance the spices. I use granulated sugar because it dissolves easily into the cream cheese mixture. Powdered sugar can work, but it might leave a slightly grainy texture if not mixed thoroughly. I’ve tested both, and granulated gives a smoother result.
Pumpkin Pie Spice
1 1/2 tsp
This blend of cinnamon, ginger, nutmeg, and cloves is essential. If you don’t have pumpkin pie spice, you can make your own: 1/2 tsp cinnamon, 1/4 tsp ginger, 1/4 tsp nutmeg, and 1/8 tsp cloves. The spice blend is what makes this taste like fall. Don’t skimp on it, but don’t overdo it either. Too much nutmeg can make it taste medicinal.
Vanilla Extract
1 tsp
Just a teaspoon to round out the flavors. Use pure vanilla extract, not imitation. The difference is noticeable, especially in a recipe with so few ingredients.
Tools Needed for Outdoor Prep
You don’t need fancy equipment. Here’s what I use to make this no-bake pumpkin pie cheesecake efficiently:
- Food Processor — I use mine to crush the gingersnaps and mix the filling. It’s faster and gives a more consistent texture. If you don’t have one, a zip-top bag and a rolling pin work for the crust, and a hand mixer or whisk works for the filling.
- 9-Inch Springform Pan — This is crucial for a cheesecake. It allows you to remove the cake easily without digging it out. Make sure it’s in good condition; a leaky springform pan can be a disaster when you’re trying to chill it. I always wrap the bottom in foil just in case.
- Grill Grates or Skillet — For toasting the gingersnap crumbs. A cast-iron skillet on the grill or the grill grates themselves work well. You want gentle heat to toast the spices without burning them.
- Whisk or Electric Mixer — To beat the cream cheese and sugar until smooth. A stand mixer is ideal, but a hand mixer works fine. Just be patient and mix until there are no lumps.
- Spatula — A silicone spatula is best for folding in the pumpkin and scraping the bowl. It ensures all the ingredients are incorporated evenly.
Keep it simple. You don’t need a thermometer or a scale, though a scale helps with precision. But honestly, I’ve made this with measuring cups many times, and it still turns out great.
How to Make Your No-Bake Pumpkin Pie Cheesecake
Let’s get into the steps. This process is straightforward, but timing and technique matter. Here’s exactly how I make it.
Step 1: Prepare the Crust (10 minutes)
Start by crushing your gingersnap cookies into fine crumbs. If you’re using a food processor, pulse until you have a sandy texture. If you’re using a bag, crush them until they’re uniform. Transfer the crumbs to a bowl and mix in the melted butter. The mixture should look like wet sand. If it’s too dry, add a little more butter; if it’s too wet, add more crumbs. Press this mixture firmly into the bottom and slightly up the sides of your springform pan. Use the bottom of a measuring cup to pack it down tightly. A loose crust will fall apart when you slice it. Place the crust in the fridge to set while you make the filling.
Step 2: Toast the Crumbs for Extra Flavor (Optional, 2 minutes)
Here’s my outdoor twist. Lightly toast the gingersnap crumbs on the warm grill grates or in a skillet over medium-low heat. Stir them constantly for about 2 minutes. You want them to smell fragrant and slightly toasted, not brown or burnt. This step wakes up the spices and adds a subtle smokiness. Let the crumbs cool completely before mixing with the butter. I’ve tried skipping this, and while it’s still good, the toasted version is superior.
Step 3: Beat the Cream Cheese (5 minutes)
In a large bowl, beat the softened cream cheese until it’s completely smooth and creamy. This is the most important step for texture. Scrape down the sides and bottom of the bowl. If there are lumps, your cheesecake will be grainy. I beat mine for about 3-4 minutes on medium-high speed. Add the sugar and vanilla extract, and continue beating until combined. The mixture should be light and fluffy.
Step 4: Fold in the Pumpkin (3 minutes)
Add the drained pumpkin puree and the pumpkin pie spice to the cream cheese mixture. Use a spatula to gently fold it in. Be careful not to overmix, or you’ll incorporate too much air, which can make the cheesecake rise and then collapse. Fold until just combined. The color should be a uniform orange. Taste it now. If you want it sweeter, add a little more sugar. If you want more spice, add a pinch more pumpkin pie spice.
Step 5: Assemble and Chill (4 hours minimum)
Pour the filling into the prepared crust. Smooth the top with a spatula. Cover the pan with plastic wrap or foil. Place it in the refrigerator for at least 4 hours, but ideally overnight. The cheesecake needs time to set. If you cut it too soon, it will be messy. I usually make it the night before, so it’s ready when I wake up.
Step 6: Serve and Enjoy
Once set, run a knife around the edge of the pan to loosen it, then release the springform ring. Slice with a sharp knife, wiping the blade between cuts for clean slices. Top with whipped cream, a sprinkle of cinnamon, or candied pecans. Serve chilled.
Total Time: 15 minutes active, 4+ hours inactive. This is a make-ahead dessert that saves you time on the day of your event.
Expert Tips from My Grill Experiments
Here’s everything I learned from making this no-bake pumpkin pie cheesecake too many times. These tips will save you from common mistakes.
Drain the Pumpkin
I can’t stress this enough. Canned pumpkin is watery. If you don’t drain it, your cheesecake will be runny and won’t set properly. I use a cheesecloth or several layers of paper towels and let it sit for 15-20 minutes. Squeeze out the excess water. This step is non-negotiable for a firm texture.
Softened Cream Cheese is Key
If your cream cheese is cold, you’ll get lumps. I leave it out on the counter for at least 30 minutes before starting. If you forget, you can microwave it in 5-second bursts, but be careful not to melt it. Warm cream cheese mixes smoothly; cold cream cheese does not.
Don’t Overmix
Once you add the pumpkin, mix gently. Overmixing incorporates air, which can cause the cheesecake to rise and then crack or collapse as it cools. Fold until just combined. It’s better to have a few small streaks of pumpkin than a bubbly, airy mixture.
Chill Thoroughly
Patience pays off. If you cut the cheesecake too soon, it will be soft and messy. Let it chill for at least 4 hours, but overnight is best. The longer it chills, the firmer it becomes, and the flavors meld better.
Common Problems & Solutions
- Crust is Crumbly: You didn’t press it down firmly enough, or you didn’t add enough butter. Pack it tightly and add a little more butter if needed.
- Filling is Runny: You didn’t drain the pumpkin enough, or you didn’t chill it long enough. Drain the pumpkin next time and chill for at least 4 hours.
- Lumpy Texture: Your cream cheese wasn’t softened enough. Beat it longer or let it sit out longer next time.
Pro Tricks
- Toast the Spices: For an extra flavor boost, lightly toast the pumpkin pie spice in a dry skillet for 30 seconds before adding it to the filling. This releases the essential oils and intensifies the flavor.
- Add a Hint of Salt: A pinch of flaky sea salt on top before serving enhances the sweetness and balances the spices.
- Use a Water Bath for Chilling: If your fridge is crowded, place the springform pan in a larger pan filled with ice water to speed up the chilling process. Just make sure the springform is sealed well.
Recipe Variations to Mix It Up
Once you’ve nailed the basic version, here’s how to mix it up. This no-bake pumpkin pie cheesecake is a versatile canvas.
Maple Pecan Swirl
Whisk 2 tbsp maple syrup with 1/4 cup chopped pecans. Swirl it into the filling before chilling. The nuttiness complements the pumpkin beautifully.
Chocolate Chip
Fold 1/2 cup mini chocolate chips into the filling. It’s a surprising but delicious twist that adds texture and richness.
Coconut Lime
Replace the pumpkin pie spice with lime zest and coconut extract. Use crushed macadamia nuts for the crust. It’s a tropical twist on fall flavors.
Vegan Version
Use vegan cream cheese (like Kite Hill or Miyoko’s) and coconut cream instead of dairy cream cheese. Use vegan gingersnaps and maple syrup instead of sugar. It holds up surprisingly well.
Gluten-Free
Use gluten-free gingersnaps or a crust made from gluten-free oats and almond flour. Ensure your pumpkin puree is certified gluten-free.
Spicy Kick
Add a pinch of cayenne pepper or smoked paprika to the filling. It adds a subtle heat that balances the sweetness. I love this for those who like a little fire.
Serving & Storage
Serving Suggestions
I serve this no-bake pumpkin pie cheesecake with a dollop of whipped cream and a sprinkle of cinnamon or pumpkin seeds. It pairs well with coffee or a glass of red wine. For a complete meal, serve it after a grilled steak or smoked brisket. It’s the perfect light, sweet finish to a heavy meal.
Storage Tips
- Refrigerator: Store in the fridge for up to 5 days. Cover with plastic wrap or foil to prevent it from drying out.
- Freezer: This cheesecake freezes well for up to 3 months. Wrap the whole pan or individual slices in plastic wrap and foil. Thaw in the fridge overnight. The texture may change slightly, but it’s still delicious.
- Room Temp: Do not leave it out for more than 2 hours. The cream cheese and pumpkin can spoil if left at room temperature for too long.
This doesn’t freeze well if you add whipped cream topping, so add that fresh when serving. The cheesecake itself, however, freezes perfectly.
Nutrition Information
I’m not a nutritionist, but here’s the breakdown per slice (1/8 of the cheesecake):
| Nutrient | Amount |
|---|---|
| Calories | 320 |
| Protein | 5g |
| Carbs | 28g |
| Fiber | 1g |
| Fat | 22g |
| Sodium | 250mg |
My Take: This is comfort food with cream cheese and sugar. It’s not diet food. But it’s better than takeout, and I know exactly what’s in it. Enjoy it in moderation as a special treat.
Final Thoughts
This no-bake pumpkin pie cheesecake is more than just a dessert; it’s a celebration of fall flavors and outdoor cooking. It’s easy, it’s delicious, and it’s a great excuse to fire up the grill for the crust. I hope you try it and enjoy it as much as I do. If you make this, drop a comment! I love hearing how it turns out in your kitchen. Happy cooking!
FAQs
Can I make this cheesecake ahead of time?
Yes, absolutely. In fact, it tastes better the next day. Make it up to 2 days in advance. Keep it covered in the fridge until you’re ready to serve.
Can I use fresh pumpkin instead of canned?
You can, but you need to roast and puree it first, then drain it thoroughly. Fresh pumpkin has more water than canned, so you’ll need to cook it down and strain it to remove excess moisture. Canned is easier and more consistent.
Why is my cheesecake runny?
Most likely, the pumpkin wasn’t drained enough, or the cream cheese wasn’t softened properly. Make sure to drain the pumpkin for at least 15 minutes and beat the cream cheese until it’s completely smooth.
Can I freeze this cheesecake?
Yes, it freezes well for up to 3 months. Wrap it tightly in plastic wrap and foil. Thaw in the fridge overnight. Add whipped cream fresh when serving.
What if I don’t have a springform pan?
You can use a regular round cake pan, but lining it with parchment paper and using a knife to loosen the edges will be trickier. A springform pan is highly recommended for easy removal.
Can I substitute the gingersnap crust?
Yes, you can use graham crackers, vanilla wafers, or even a nut-based crust like almond flour. Gingersnaps add a spicy kick that pairs well with pumpkin, but other cookies work too.
Is this recipe gluten-free?
Not as written, but you can make it gluten-free by using gluten-free gingersnaps or a gluten-free crust recipe. Just ensure all ingredients are certified gluten-free.
Pin This Recipe!
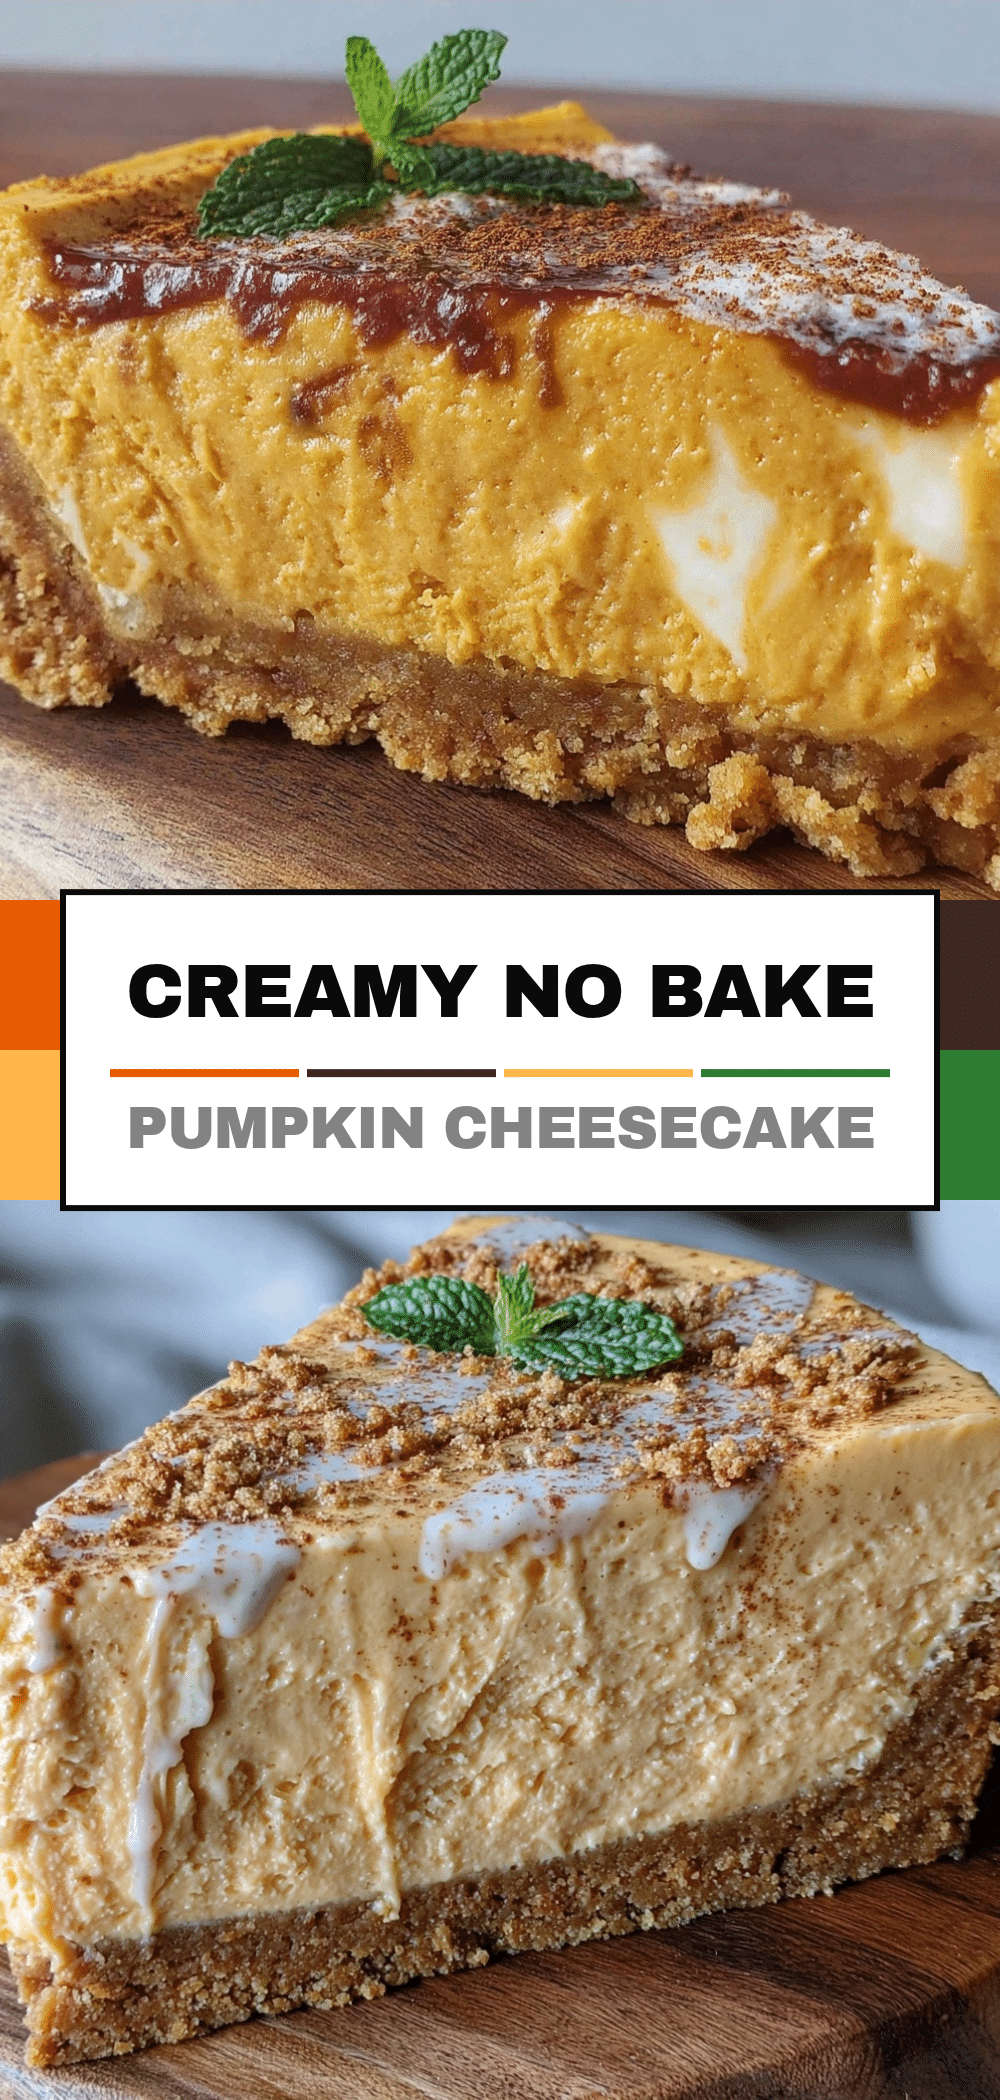
No-Bake Pumpkin Pie Cheesecake: Best Outdoor Grilled Dessert
- Total Time: 4 hours 15 minutes
- Yield: 8 servings 1x
Description
A creamy, no-bake pumpkin cheesecake with a smoky gingersnap crust, perfect for outdoor gatherings and fall celebrations without using an oven.
Ingredients
- 16 oz (450g) full-fat cream cheese, softened
- 15 oz (425g) canned pumpkin puree, drained
- 2 cups (approx. 200g) gingersnap cookies, crushed
- 4 tbsp (57g) unsalted butter, melted
- 1/2 cup (100g) granulated sugar
- 1 1/2 tsp pumpkin pie spice
- 1 tsp vanilla extract
Instructions
- Crush gingersnap cookies into fine crumbs using a food processor or rolling pin.
- Mix crumbs with melted butter until the texture resembles wet sand.
- Press the crust mixture firmly into the bottom and slightly up the sides of a 9-inch springform pan.
- Optional: Lightly toast the crumbs on warm grill grates or in a skillet for 2 minutes to enhance flavor, then cool completely.
- Beat the softened cream cheese in a large bowl until smooth and creamy (3-4 minutes).
- Add sugar and vanilla extract to the cream cheese and beat until light and fluffy.
- Gently fold in the drained pumpkin puree and pumpkin pie spice until just combined.
- Pour the filling into the prepared crust and smooth the top.
- Cover and refrigerate for at least 4 hours, ideally overnight, until set.
- Release the springform ring and slice with a sharp knife. Serve chilled with whipped cream or toppings.
Notes
Drain the canned pumpkin puree for 15-20 minutes to remove excess moisture, which is crucial for setting the cheesecake. Ensure cream cheese is fully softened to avoid lumps. The recipe can be made gluten-free by using gluten-free gingersnaps or almond flour crust.
- Prep Time: 15 minutes
- Cook Time: 0 minutes
- Category: Dessert
- Cuisine: American
Nutrition
- Serving Size: 1 slice (1/8 of the
- Calories: 320
- Sugar: 20
- Sodium: 250
- Fat: 22
- Saturated Fat: 12
- Carbohydrates: 28
- Fiber: 1
- Protein: 5
Keywords: no-bake cheesecake, pumpkin pie, gingersnap crust, outdoor dessert, fall recipes, grilled dessert, make-ahead dessert


